Dredging the Depths
| Dredging the Depths | |
|---|---|
| Section | Depths of Tyria Quests |
| Campaign | Eye of the North |
| Given by | Molenin in Umbral Grotto (Depths of Tyria) |
| Type | Secondary quest |
| Map(s) | |
   (Click to enlarge) | |
Quest information[edit]
Objectives[edit]
- Free the Dredge slaves by slaying Stone Summit Taskmasters.
- Discover what the Stone Summit Dwarves are searching for in the Vloxen Excavations.
- Seek and destroy Zoldark the Unholy.
- See Molenin for your reward.
Reward[edit]
- 7,500 Experience
- 1,500 Gold
Walkthrough[edit]
- Level 1
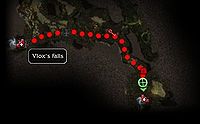
Best starting point to enter Vloxen Excavations for this quest is from Vlox's Falls, then head east into the dungeon where you will find groups of Stone Summit and Dredge Slaves. You will soon find the boss Taskmaster Durgon; defeating him will release the first Slaves and drop the Boss Key to the second level. The best tactic to defeat him is to first kill the healer. Light of Deldrimor will reveal a Dwarven Ghost near the area map.
- Level 2
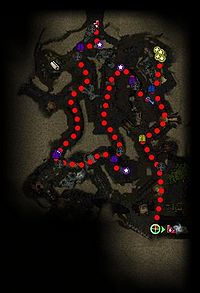
On the second level, you must seek out and defeat Taskmaster Kurg and Taskmaster Bellok. If you are playing in hard mode, it is advisable to pull Bellok's group away from the nearby Resurrection Shrine (they will follow quite far); otherwise, a party wipe, will respawn you to close to the enemies and you might easily reach -60% Death Penalty. After Bellok is eliminated, a Dredge Slave will show the way to some Dwarven Powder Kegs to blast through a cracked wall and gain access to the entrance of the dungeon's third level. There is a lever in the southwest of the southeastern chamber which disables the Poison Dart traps; however, it is out of the way. Light of Deldrimor will reveal a Dwarven Ghost near a Beacon of Droknar past the second door opened by the master gear. There is a Hidden Treasure near Taskmaster Kurg.
- Level 3
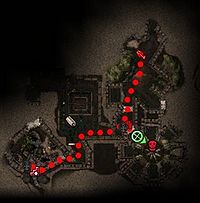
On the third level you will need to find Sotanaht the Tomb Guardian, who holds the key to access the dominion of Zoldark the Unholy. The third level also contains 2 levers which disable all the Poison Dart traps there: one in the northwest of the northwestern room, and one in the northwest of the northeastern room (just beyond Sotanaht the Tomb Guardian).
To kill Zoldark the Unholy, kill his minions until he stops resurrecting them. He loses health every time he resurrects one, and he cannot heal so he will continue losing health with every resurrection. He will be easy to kill once he is unable to resurrect his minions.
Dialogue[edit]
Initial dialogue[edit]
Molenin
- "I recently escaped from the most terrible of places. We were moved there after the adventurers destroyed the Iron Forgeman in Sorrow's Furnace. Near here lies an excavation led by an evil necromancer named Bellok. The earthquakes tore open an ancient crypt where Bellok hoped to harness the power of an ancient lich. His taskmasters work my brothers 'til they are no more. Please, help us poor Dredge reunite the moletariate and rise again in unstoppable numbers! You must free my people!"
Intermediate dialogue[edit]
<Party leader>
- "Drakes. Why did it have to be drakes?"
- "Fight back, Dredge! We are here to release you from Dwarven bondage!"
Dredge Slave
- "Wait! You must listen! We were not forced to dig for gold or gems. These Dwarves want something far more valuable than mere ore, and they will continue to mine despite your small victory. They are obsessed with...or, perhaps possessed by...a malignant force that lies beneath. It promises power but only delivers pain and suffering.
- Please, if you are willing, obtain Taskmaster Kurg's key and open the powder room to the northeast. Inside you'll find powder kegs you can use to access Zoldark's tomb. We've dug deep enough that a powder keg should be able to blast through the weakened walls. You must defeat the evil below or we shall be enslaved forever."
Zoldark the Unholy
- "Excellent. You're just in time to feed my children...."
Reward dialogue[edit]
Molenin
- "Thank you! You have struck a great blow for the moletariate, hero! Perhaps I'll include you in my next manifesto."
Notes[edit]
- Light of Deldrimor rewards are listed in the Vloxen Excavations entry.
- In hard mode, Frozen Soil will prevent the Dwarves on the first two levels from resurrecting their fallen.
- Three minutes after everyone in your party opens the reward chest, you will be automatically mapped to Umbral Grotto, even if you began in Vlox's Falls.
- Level 2
- Prepare for Ranger foes striking you from height advantage, which can lead to higher than expected spike damage.
- When facing Taskmaster Kurg, you can pull him or his allies away from each other. If you kill him first, the nearby Dredge will rise up and help you kill the remaining foes.
- If you wipe near the fourth Master Gear, you will respawn at the entrance to this level (since that will be the closest resurrection shrine).
- Level 3
- The Ancient Undead respawn every two minutes (until Zoldark dies). (Be careful of those close to the Boss Lock; if you draw them towards the nearby resurrection shrine, you can make it difficult to reach the Boss Key.)
- After killing Zoldark, all remaining foes will disappear, allowing you time to safely open Locked Chests and look for Hidden Treasures.
Trivia[edit]
- The decline dialogue for this quest references the events of Sorrow's Furnace, the Stone Summit mining operation in the Southern Shiverpeaks.
- There are several references to Raiders of the Lost Ark (source): Bellok (one of the taskmasters) takes his name from Dr. Rene Belloq and the intermediate dialogue referring to drakes paraphrases Indiana Jones comments about snakes.
- The accept dialogue paraphrases the "Heigh-Ho" song, made famous from Disney versions of the story of Snow White and the Seven Dwarves.
- Sotanaht is Thanatos spelled backwards; he was the god of non-violent death in Greek mythology.
- The reward dialogue refers to Karl Marx and his communists' manifesto (proletariate); however, Molenin's "Lost Note" found on the first level violates that treatise's third plank.