Fort Koga
| Fort Koga | |
|---|---|

| |
| Region | Maguuma Jungle |
| Victory condition | Annihilation |
| Party size | 4 |
| Allowed levels (Zaishen Challenge and Elite) | Any |
| Allowed levels (normal) | 20 |
| Priest/Obelisk | No |
| Effect | None |
“Years ago, Fort Koga was a key defensive point between Kryta and the western coast of Tyria. Guilds from across Tyria came to siege its walls, for those who controlled the fort controlled the trade routes.
— Description
Fort Koga is one of the maps in rotation in Random Arenas, Codex Arena, Zaishen Challenge, and Zaishen Elite.
The map is composed of a raised circular walkway that encloses the central area of the fort that is accessible by stairs. The walkway has two bridges under which players can move, although there typically is not a reason to do so because the path underneath the bridges doesn't lead anywhere.
Objective[edit]
Annihilate the opposing party.
Common tactics/tips[edit]
- Battles are usually staged to the northwest of the map; from either start point, cross the bridge to get there. However, ranged attackers will typically gain a greater advantage by going to opposite direction due to both the height advantage in the fact that the area across the bridge has many obstructive walls. Depending on your team composition, it may be advisable to proceed the alternate route.
- The many walls on this map can render projectiles largely ineffective. Casters are advised to use these as cover as much as possible.
- The bridges themselves can also be used as obstructions. This can, however, easily be countered by moving onto or over the bridges.
- Players on top of and under bridges can melee and shoot arrows at those underneath and above them.
Trivia[edit]
| The Guild Wars 2 Wiki has an article on Koga Ruins. |
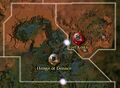
- Fort Koga was once playable from the World Map of Tyria, located above Henge of Denravi. Players can no longer discover this map since the outpost was closed after the Thursday, October 22, 2009 update (see "Notes" section) when ArenaNet removed the Team Arenas. The path to access the outpost is now locked with giant roots blocking the entrance.
- During the two 2004 Beta Weekend Events, Fort Koga was a much bigger PvP zone. One team would start inside the Fort and the other would start outside, this can still be seen in the unfogged map. Already in 2005 and onwards, the two exits to the exterior area were blocked by two carts, reducing the battleground only inside the Fort itself.
Gallery[edit]
Outpost icon, between 2005-2009, before the Team Arenas closing.
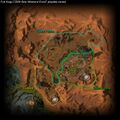
Map with the accessible areas in the 2004 Beta Weekend Events. Outpost + Team 1 zone + Team 2 zone.
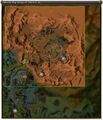
Outpost map, without fog, before the closing.
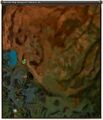
Outpost map, with fog, after the closing.
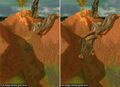
Entrance via Henge of Denravi, pre and post lock with giant roots.
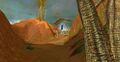
Outpost portal seen through the giant roots.
Outpost portal front.
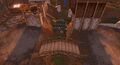
Outpost interior.
Left exit blocked by a cart.

Left exit blocked by a cart, alternate angle.
Right exit blocked by a cart.
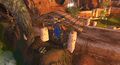
Right exit blocked by a cart, alternate angle.
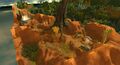
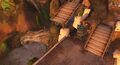
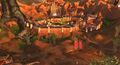
Full aerial view, including the outpost, the fort and the exterior.
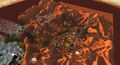
Full aerial view, alternate.

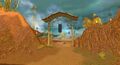
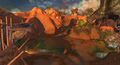
Exterior zone (camp).
Exterior zone (hillside 1).
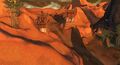
Exterior zone (hillside 2).
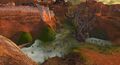
Exterior zone (trench).
Exterior zone (back view).
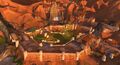
Interior zone.
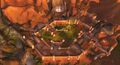
Interior zone, alternate view.
.jpg)

.jpg)
.jpg)


.jpg)
| Random Arenas | |
|---|---|
| Outposts: | Random Arenas |
| Annihilation arenas: | Amnoon Arena • Ascalon Arena • Churranu Island Arena • D'Alessio Arena • Fort Koga • Petrified Arena • Shing Jea Arena • Shiverpeak Arena • Sunspear Arena |
| Obelisk Annihilation arenas: | Brawler's Pit • Heroes' Crypt |
| Priest Annihilation arenas: | Seabed Arena |
| Kill Count arenas: | The Crag |
| Out of rotation arenas: | Ahmtur Arena |