The Sulfurous Wastes
| The Sulfurous Wastes | |
|---|---|

| |
| Campaign | Nightfall |
| Region | The Desolation |
| Type | Explorable area |
| Exit(s) | Gate of Desolation Remains of Sahlahja |
| Images | |
 Interactive map Non-interactive maps | |
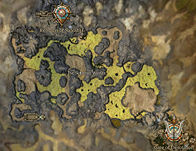
 Reaching the northern plateau | |
The Sulfurous Wastes forms a deadly natural barrier that separates the lands of Elona from the rest of the continent. Far to the northwest lies the Crystal Desert, of which these sulfurous sands had once been a part. The poisonous fumes emitted by the corrupted sands (Sulfurous Haze) is so lethal that all living creatures will die within seconds of directly inhaling these fumes. Only the Junundu wurms appear immune to the deadly gas, with exception of the colossal Desert Wurms.
Getting there[edit]
Head out the south exit of Remains of Sahlahja or the northwestern exit of the Gate of Desolation.
Most of this explorable area is actually optional, as the required travel through this area is accomplished in the Gate of Desolation mission, however the primary quest Crossing the Desolation requires a short entrance into this area.
Shrines[edit]
- Ghostly Priest → Elemental Hunt
- Ghostly Priest → Margonite Battle
- South of the northwestern corner.
- Ghostly Scout → Mandragor Hunt
- In the middle along the southern edge.
- Ghostly Scout → Undead Hunt
- At the exit into the Gate of Desolation.
- At the exit into the Remains of Sahlahja.
- At the southwestern corner.
- Near the center of the area.
- Resurrection shrines with a statue
- Avatar of Dwayna
- In the middle along the southern edge.
- Champion of Balthazar
- At the exit into the Remains of Sahlahja.
- Lyssa's Muse
- At the southwestern corner.
- Near the northeastern corner, east from Kwesi the collector.
- Melandru's Watcher
- Near the center of the area.
- Voice of Grenth
- At the exit into the Gate of Desolation.
- South of the northwestern corner.
Quests available[edit]
NPCs[edit]
These quests affect the spawns in this area:
Allies[edit]
 24 Infantryman Hareh
 20 Ghostly Priest
- 10 Ghostly Scout
- 20 Kwesi (collector for 5 Sandblasted Lodestones)
Palawa Joko's minions[edit]
- (Note: These spawn in the southwestern corner only if the A Show of Force quest has been completed)
 24 (26) Carven Effigy
Mummies (Undead)
 24 (26) Awakened Blademaster
 24 (26) Awakened Gray Giant
 24 (26) Awakened Acolyte
 24 (26) Awakened Defiler
 24 (26) Awakened Thought Leech
- 24 (26) Awakened Cavalier
 24 (26) Awakened Dune Carver
Foes[edit]
- 24 (26) Margonite Executioner
- 24 (26) Margonite Bowmaster
- 24 (26) Margonite Cleric
- 24 (26) Margonite Seer
- 24 (26) Margonite Sorcerer
- 24 (26) Margonite Ascendant
- 24 (26) Margonite Reaper
Demons (Torment creatures)
- 28 (30) Blade of Corruption
- 28 (30) Arm of Insanity
- 28 (30) Shadow of Fear
- 28 (30) Scythe of Chaos
- 24 (26) Shambling Mesa
- 24 (26) Sandstorm Crag
Elementals (Djinn)
- 24 (26) Ruby Djinn
- 24 (26) Diamond Djinn
- 24 (26) Sapphire Djinn
Elementals (Undead)
- 24 (26) Carven Effigy
- 22 (26) Mandragor Terror
- 22 (26) Ravenous Mandragor
- 22 (26) Mandragor Sand Devil
- 22 (26) Graven Monolith (spawns only if the A Show of Force quest has not been completed)
Mummies (Undead)
- 24 (26) Awakened Blademaster
- 24 (26) Awakened Gray Giant
- 24 (26) Awakened Acolyte
- 24 (26) Awakened Defiler
- 24 (26) Awakened Thought Leech
- 24 (26) Awakened Cavalier
- 24 (26) Awakened Dune Carver
- 28 (30) Desert Wurm
Bosses[edit]
- 28 (30) Hajkor, Mystic Flame → Savannah Heat (Hajkor's Flame)
- 28 (30) Bohdabi the Destructive → Order of Undeath (Bohdabi's Spire)
 28 (30) Alem the Unclean → Weapon of Remedy (Alem's Remedy)
- 28 (30) Vahlen the Silent → Vow of Silence (Vahlen's Vow)
Objects[edit]
- Ancient Elonian Chest
- Gravesite
- Treasure Chest, can be found in the ancient temple in the southwestern corner.
- Wurm Spoor
Notes[edit]
| The Guild Wars 2 Wiki has an article on Sulfurous Wastelands. |
- To reach the small northern plateau on the map, you must destroy a pillar using Junundu Smash to create a bridge (see map above).
- The pillar's base is on the southern side of the narrow east-west Sulfurous Haze path to the north.
- Junundu Smash requires adrenaline, which you can build up by fighting the undead to the east or west or by attacking the Margonites on the north plateau from the path below. Either way, use Junundu Tunnel to quickly return to the pillar.
- Infantryman Hareh, who has two secondary quests, is on that northern plateau.
- Vanquisher runs of this area without active quests require defeating around 329 foes. Including quest influences, it has been reported to range from 237 to 421 foes.
- There are three Margonite groups on a small northern plateau that can only be fought after smashing a pillar (see above). If you kill all available foes before knocking down the pillar, you will be unable to complete the vanquish unless you can find another way to generate the required adrenaline to power Junundu Smash.
- If you have vanquished everything nearby but have a minion master you can sacrifice party members or heroes on the sulphurous sands to generate corpses. Then sacrifice the minion master to make the minions hostile, letting you build up the adrenaline needed for Junundu Smash. Video.
- Alternatively, if you have a bow or spear and no minion master, you can use the ranged basic attack against the Margonite groups to build up the adrenaline needed to smash the pillar.
- Bohdabi the Destructive's undead mob in the northwest can be hard to handle on foot. You can make use of the wurm spoor in the extreme northwest and then aggro as many monsters as you can.
- There are hidden Mandragors towards the southwest.
- Activating Requiem for a Brain while vanquishing will spawn additional foes.
- This area is a good place to farm Sunspear and Lightbringer points, especially if A Show of Force and Requiem for a Brain are active.
- During an Elonian Support weekly bonus, you can max your Lightbringer title by vanquishing the area around ten times.