User:Yoshida Keiji/Urgoz's Warren - Safeway
Walkthrough[edit]
Overview[edit]
A balanced party without any special Team Build shall take nearly 1 hour to up to 2-3 hours to complete this mission, depending on the group's cooperative organization and lead/guide's experience and gameplay skills. Most party compositions will have: A tank (e.g.: Shadow Form assassin), a bonder (hero monk preferably since a build with 4-5 bonds will leave a player with only 3-4 skills (dull build) to use during the entire adventure) and a player with EoE (any secondary Ranger). The way up to the end-boss will seem to be relatively similar, but the very last section has a very different mechanism and may surprise players.
Patience and cooperation are the keys to success. Unexperienced players persistance to press on forward for speed always results in party wipe. As well as different players attempting to lead the whole group in more than one direction will confuse the team and have it separated one from another halving both firepower and defense, which also results in failure most of the time. It is very important to watch the radar for indications as the entire area is over-populated by hidden spawns, one false step can easily waste all the time and efforts spent to reach that place.
The entire mission area is a maze, if counting the shorter path, there are a total of 11 sections, most with a Twisted Bark causing an Environment Effect and/or a Guardian Serpent locking the gates to the next room. There also are root like doors that close and open on a timely fashion.
Prepare a team composition which assigns a few extra resurrection skills on others than just the healers. Since Urgoz has one shot kill attacks it is suggested to take Rebirth and/or Unyielding Aura for distance safe usage as well as "We Shall Return!" for mass rez. EoE is a skill considered "vital" for most players when dealing with the end-boss and it is suggested to be taken by a backline/passive character who won't be one shot killed by Urgoz's long range arrows.
Section 0[edit]
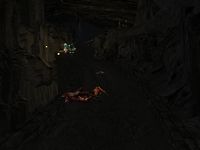
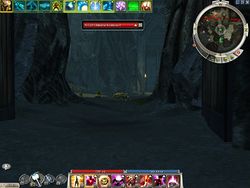
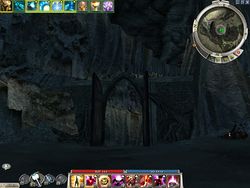
This place is exactly the same as the outpost but without the NPCs and the doors opened. The last survivor of the Kurzick Architects will run inside and remain idle with no purpose but to warn longtime elder players that the map's layout was updated. This section serves only as a retreat point from a bad start but has no purpose as there are no "bad-spawns".
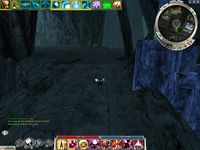
The party will start ahead of it, in a corridor just before the next section.
Section 1[edit]
This section can be divided into 5 points:
- Hopping Vampires which cause instant death to target.
- Entrance patrol.
- Central Patrol.
- Twisted Bark at center.
- Chamber.
- Hopping Vampires
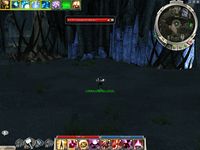
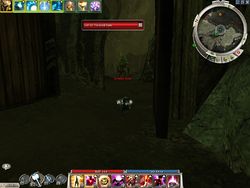
These creatures will kill their target with a skill called Suicide Health. These foes are pop-ups and any unawared team will suffer their attack. Spirits can be used as decoys by summoning them at the party's start point. Teams without spirits can sacrifice characters without Resurrection skills while leaving at the back those who can resurrect others. Send one character out of the corridor into the large room and have him/her back once they appear, while the rest of the party awaits at Section cero. Despite the inconvenience, this instance is fast to get past and certainly took you more time to read this than walking through it.
- Entrance patrol
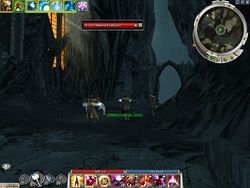
A group of Dredges will be scouting nearby the corridor, a tank player will have enough space to lure them back to the passage like a bottle neck trap, with enough room to have the main team awaiting at the corridor's corner to attack.
- Central patrol
These will be wandering around the Twisted Bark in extended pathings and can be lured larger than the entrance patrol, use the same tactic.
- Twisted Bark
Once all Dredges have been dealt with, proceed to attack this foe who doesn't pose any real threat. It's death will remove the Weakness Environmental Effect.
Now proceed to the stairs behind but DO NOT enter yet.
- Chamber
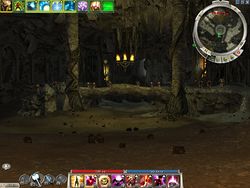
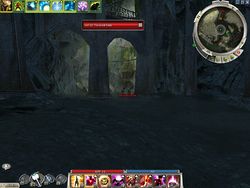
You shall see a chamber with two rooms to the sides one left and another right. There are four hidden spawns here. Lure the visible one to the stairs and once these are killed, the tanker should move inside to trigger the first two pop-ups and then lure back again to the stairs. The remaining two groups will remain hidden inside each separate room, unless a party member or minion triggers them. Kill the Guardian Serpent to open the gates to the next section.
Section 2[edit]
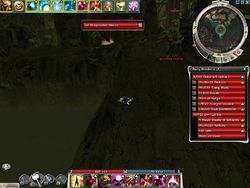
- Immediately after the gate, you will notice a "shadow-light" ground mark, crossing that line will trigger a -15 health degeneration provoked by the Twisted Bark close-by, killing it will remove the Environmental Effect but it is surrounded with hidden pop-ups which can be hard to deal with while the negative effect is still active.
- Make your team remain in the safe area and cornerblock them back to finish them off.
- There will still be other pop-ups beyond the tunnel, but the team is now clear to kill the Bark and remove the Environmental Degeneration. Make your team remain on the high ground and send the tanker to trigger all the hidden spawns and lure them back to finish them all. The tanker must ensure to run through the slope until reaching the Guardian Serpent but without fighting it yet.
Once the area is clear, kill together the Serpent to open the gates to the next Section.
Section 3[edit]
Once the gate opens, instead of entering to fight, draw back your main team to section two so that the tank can use the tunnel as a bottle neck trap and ball all foes a little behind the gates. There are several Burning Brushes with Double Dragon. After all these are killed, the tanker has to clear the area of ranger traps placed by the Brooding Thorns (Barbed Trap, Flame Trap, Viper's Nest), use anti-knockdown skill like IAU.
When a straight way has been cleared, have everybody rush for cover under the bridge. If using heroes, pay attention to where they stand. You must flag them all or they will remain unprotected at random spots. Watch their health bars to know who is still in danger. Kill all enemies from underneath, and once the threat is over, use the ramps to each side to find the two levers and pull both down to open the gates to the next Section. As mentioned in Section 0, the December 15, 2011 update changed the map layout to facilitate exploration without teleportation (Consume Corpse/Necrotic Traversal).
Section 4[edit]
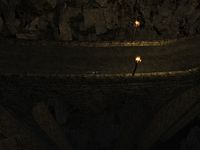
Here you will find a narrow bridge with torches to its exits and another pair in the middle. There are several Fire Flowers which will spit fire on whoever walks over the path, keep the main team near the start and make the tanker lure hidden spawns. There are a total of 4 pop-ups here, mainly Thorn Wolves, but the last one will have once again Hopping Vampires. It is very common to see the tanker getting body blocked and unable to return with aggro, specially if rubber-banding. Hidden spawns are at: First quarter (which also triggers foes at the beginning), in the mid-point, third quarter and the other side exit. Once the middle pop-up has been cleared, make the main team stand between the torches and send the tank to lure the remaining two hidden spawns.
Kill the Guardian Serpent to open the gates to the next Section... but do NOT enter yet.
Section 5[edit]
This section is under the Sheer Exhaustion Environmental Effect and can be divided into three parts:
- The first is a small room with two exits (West and North), there are around 5 hidden Thorn Wolves pop-ups. Again have the main team remain back before the previous Guardian Serpent and send the tanker to lure enemies and finish them all. The tanker needs to double-check no foes remain hidden by using the aggro-bubble to cover all the light gray area without stepping onto the green area, until the Vine Gate before entering the next part of this section.
- The second part will have a bridge with a Vine Gate exit that opens and closes in a timely fashion, place your main team a little back so that the tank can ball enemies on the other side of the gate so that the party can attack even if the tanker remains trapped but at the same time ensuring safety for the rest of the group. The tanker only needs to trigger the pop-ups of the right side, and ignore the lone foe to the left or else trigger additional enemies on grounds the team doesn't need to walkthrough.
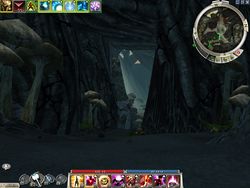
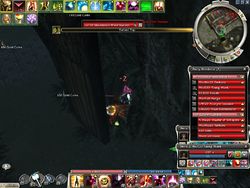
- Now, make your main team stand above the little hill (picture) which is Exhaustion free spot to prepare for the next part and engage enemies from that place. The following room can be cleared exactly in the same way as the first part, the tanker will lure more Thorn Wolves pop-ups and must once again double-check the grounds until the next Vine Gate prior Section six.
Section 6[edit]
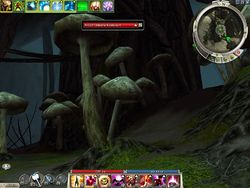
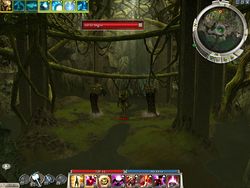
The main team shall remain behind the Vine Gate's protection while the tank lures hidden spawns from the space in front, there is a fork here, proceed to the left side with big mushrooms. And hold position at the next Vine Gate.
Again, keep the main team behind protection and the tank should trigger all the hidden spawns, strafing until the next Vine Gate (but without entering) and the ramp at the right that leads towards a bridge. This will secure the area, otherwise wandering characters might cause pop-ups if not properly cleared. When you see a mushroom in the middle, there is another fork, continue by the bridge.
The bridge itself is clear, but the area ahead will have 3-4 more Thorn Wolves pop-ups: lure, ball and spike. The tank can ball-up close to the blue stone penetrating the bridge and have the main team at the back. BUT... do NOT aggro the 3 visible foes in front, those will remain stationary and there is no need to engage them or you will waste time. Draw the compass with a line to tell the party.
To the right of that area, there is another fork with two Vine Gates, take the right path which has Underworld skin. You will be walking underneath the bridge you just crossed. After that, there will be two more Thorn Wolves spawns.
The next Section contains a death trap which triggers if all party members enter together at the same time. In order to avoid team wipe, one character MUST remain here, make it player or hero. There is no need to choose who stays as in the next Section, the party will only need to kill two Guardian Serpents and a Twisted Bark. Whoever was left behind shall not cross the next bridge until told by the others to catch-up.
Section 7[edit]
Cross the bridge and kill the Guardian Serpent to open the gates. You will need to make a U turn left to find the other Guardian Serpent. But before that, the party needs to kill the Twisted Bark which also causes Energy Drain (effect) Environmental Effect in the final section, making it a very wise choice to deal with now with range attacks if possible to avoid aggroing the other foes past it which are not needed to be killed. Cross the bridge entirely until stepping out of it on the other side, you shall see some windows with inside lightnings.
Only after all other 11 characters are on the opposite side of this bridge, you can signal the character who was left behind to re-join the main team. Wait for him/her/it.
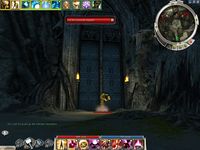
The next Section will look empty at first sight, but the map will refresh once a single character gets near the wooden gates.
Section 8[edit]
Section 8 is the tomb of many teams, the most common fails are:
- Rushing & Suicide.
- Large mobs firepower overwhelming the party's defensive ability.
- The mobs large pull range: Enemies can follow survivors even back to the last bridge in Section 7.
Any party with heroes is highly recommended to flag them all near the back bridge. This will allow the tanker enough space to pull and ball. Any hero that is NOT flagged has a very high risk of breaking the tanker's ball and drawing those enemies to the main team, to finally wipe.
There are a total of six large mobs:
- Three at the front's left/center/right and
- Three at the back's left/center/right.
The three front groups can be lured back to the corridor. The tanker should stop somewhere inside the gates free of both Environmental Effects ahead (Sheer Exhaustion and Weakness). Any player with heroes can send them to attack once the tanker has balled-up. If the tanker is bringing heroes, instead of unflagging must re-flag not to close of the aggro or else the heroes will sit on the ball too.
Once the first front groups have been killed the Guardian Serpent can easily be defeated too, but since the party will need THIS room to fight the mobs in the next Section, it is convenient to go and kill the Twisted Barks as well.
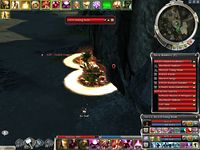
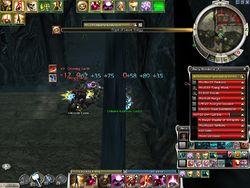
From the three back groups, the center mob can be pulled almost in the same way as the front groups. But, the side groups will not chase the tanker as much back further as the others. The main team can hold position just behind the gates, safe from both Environmental Effects. And the tanker can lure the side enemies by cornerblocking them (picture 8-2). While performing these last pulls the tanker will most likely lose the bonds, unless the Bonder follows within a safe distance and withdraws with appropriate timing.
Finally the entire party can rush in and face the two lonely Twisted Barks without any threats.
Section 9[edit]
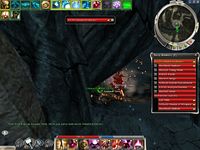
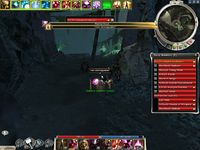
Inside this rectangular structure, there are 6 groups of Warderns posted in a 2-2-2 formation. You will be entering from a corner, the three groups closer to the entrance can be lured into the middle of the previous section. While the last three groups diagonally from the corner will not get past the stairs. The Maddened Earth Warden have Churning Earth and Shockwave, spread the main team so that the entire party doesn't take full hits. Each of the screenshots sequence provided here are meant to show which Warden group is being pulled, the tanker's balling position and where to flag / stand the main team.
There are Plant foes inside too, but these ones are stationary and don't pose much threat. You don't need to clear the entire area to proceed, just the Guardian Serpent will do to open the gates to the next Section.
Section 10[edit]
There is another death trap here, if the entire party enters together at once, the wooden gate will close behind leaving the team literally "against the wall". To avoid this, have one character remain between these two gates, at the short corridor you just crossed. If it is a player make sure to tell him/her cannot walk past the gate. If hero, use the "Individual" flag instead of "All" flag as a precautionary measure. Depending on the number of heroes you are taking, sometimes you might need to unflag the main team members to deal with foes that cannot be pulled up to the corridor... and if you accidentally unflag "All" with the character that was holding position... the back door will close. It will only re-open once the entire room has been cleared.
This area is infested with spawns and clearing the entire place is time consuming. There is no way to skip these enemies as the gates to the next Section will only open once all foes had been wiped clean. That is the signal to release the character standing back at the corridor.
Two type of foes, more Thorn Wolves and also Greater Blood Drinker. The first are melee while the second are ranged attackers like Bone Fiends. Killing one group will spawn another in any random location. The tanker will need to strafe around to find the hidden foes.
Once again, use the corridor to keep the main team safe while the tank stands by the wall.
Section 11, Urgoz[edit]
After crossing the short corridor, you will see a Twisted Bark standing alone. This time, don't worry, no hidden spawns but only causing Life Drain. Rush and spike to remove the Environmental Effect.
There is a short bridge in front with Uprooted Malices which have Ray of Judgment and Scourge Healing. Lure, pull and spike. The tank will need to trigger the ranger traps before the main team proceeds to kill the Guardian Serpent. There are two others at each side which can be killed before entering the end boss chamber, by moving towards the side edges and attacking from atop. These ones will open the side gates in case any player nearby needs to retreat during the final fight.
Take a look at the final stage, it has water areas. Stepping into these parts will trigger another Environmental Effect called Defiled Water, common in the Echovald Forest which increases the conditions duration by 20%. The end boss Urgoz is escorted by two Greater Serpents with Scourge Healing, but there is no need to kill them first to defeat Urgoz.
Urgoz uses a Monster Skill called Forest's Binding which is a very large range (almost compass range) projectile that causes the target to be hexed with Binding Chains if it hits, but can be obstructed by the stone columns nearby. However, entering his aggro range will trigger Explosive Growths on any character standing still on a same spot over 2 seconds. These creatures are bombs that deal 300 damage to all adjacent foes and also causes a 3-second knockdown with a skill called Exploding Spores which leaves anybody highly vulnerable to Urgoz's arrows deadly hit. It is wise to move away before they explode.
The most common tactic to defeat Urgoz is to use Edge of Extinction so that the exploding Plants also damage the end boss. It is of out-most importance to pay attention where it is placed and that it remains alive during the whole battle or all efforts will be wasted. Will certainly need a few recast depending on team performance.
- Activating this skill too close to Urgoz will cause an Explosive Growth to spawn nearby and kill it with an explosion.
- Activating this skill too far from Urgoz will not cause any effect since Urgoz will not be within range.
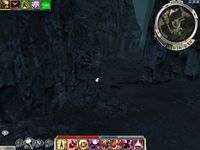
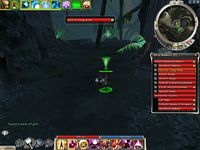
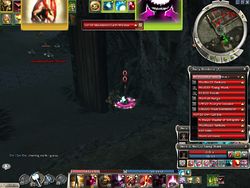
- Use the spot marked on the screenshot which also has the cover benefit of a stone column: Descend the ramp and make a U turn left. The entire party should be reminded to keep an eye on EoE active and if possible make the skill bearer remain at the spot since he/she might actually die from an Urgoz's arrow shot. Everything will happen too fast and asking somebody else for resurrection can be very dangerous, as the rezzer could die too.
But to make this Nature Ritual work, the offensive team members will need to lower his health below 90%. This must be done with two methods:
- Running around Urgoz intentionally without crossing paths with another player or hero to spawn more Explosive Growths, but always withing EoE range (keep watch of your Effects monitor).
- And of course, attacking Urgoz.
Despite all the trouble to lower his health, almost anything will work against Urgoz:
- Degeneration hexes.
- Degeneration conditions.
- Physical damage.
- Elemental damage.
- Arrows / Spears.
- Spirits.
But... the skills selection must follow these two conditions:
- Short activation / cast time: 1 ~ 2 seconds:
This is because if activating a skill takes 3 seconds or longer, an Explosive Growth will spawn where you are and halve your life, plus you are not the only character in action.
- Lower energy requirement or signets, 5 ~ 10 cost:
Withing the most expected chance that a character is killed, once it is resurrected, it will not have full energy in most of the cases and doubtfully will have the opportunity to activate any offensive skill immediately.
When party members die in action, it is recommended to keep one rezzer behind another rezzer because Urgoz's range is large, there will be several explosions around and a great chaos going on. If all rezzers die together...that will be the end... of YOU.
Finally Urgoz will fall and the Chest will spawn to collect the rewards. At the very back of this chamber, a teleportation device will active which takes players back to the outpost.
Team Build creation:[edit]
Team Build: Urgoz's Warren Safeway
User:Yoshida Keiji/Urgoz's Warren - Safeway/Team Build
Tank:[edit]
An assassin with Shadow Form is the perfect choice compared to warriors or dervishes. A warrior would need at least two/three copies of Spell Breaker and a dervish with Vow of Silence won't be able to cast spells by himself.
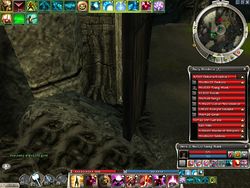
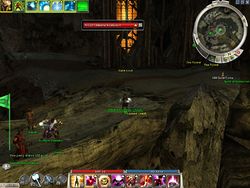
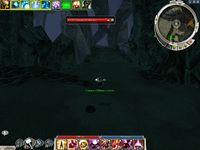
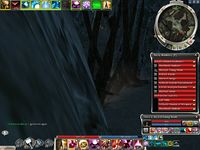
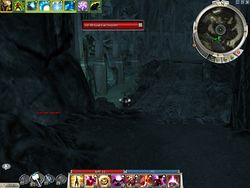
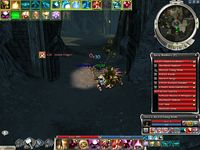
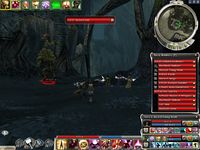
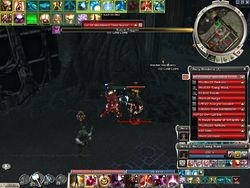
At the beginning only, watch out from the Maddened Dredge Seers who have Disenchantment which can rend Shroud of Distress as you can see in screenshot 1-0, have Mental Block unused as back-up. This spirit may not always aim at you but if it does...
From by build, Obsidian Flame is optional and you can choose any variant you want, but it's wise to set-up in coordination with the Bonder.
Bonder:[edit]
The Bonder must take 3~4 skills: Life Barrier, Life Bond, Blessed Signet and why not Rebirth. The other half of skills can be of choice but must respect the Tanker's preferences.
Three factors will have influence on decisions:
- The Tanker's ability.
- The main team's overall experience.
- The party's overall balance between Players and Heroes.
If these aspects are positive, then the duo can set-up on offense, but if these factors are unfavorable it's best to mind a defensive arrangement.
There is also a fourth detail:
- Many players, guides, tutorials, videos will tell you that all Terras MUST have Blessed Insignia: That is BULLSHIT, except maybe some areas packed with elementalist foes that were buffed along with the September 13, 2012 Game Update with spells that now also inflict Cracked Armor. But in Urgoz's Warren there is NO such threat. You shall see that my character is only using Radiant Insignia, and actually I can do any other Terra job with this set-up. This statement has been double-checked in areas like Section 9 versus two Warden groups locked on me while the main team withdrew back to the point all their names turned grey, but once they came back I was still standing. Any Terra with a shield of Devotion shall do just fine. In case the Terra feels more secure with Blessed Insignia, he/she will have 8 energy base less, so the Bonder shall have Balthazar's Spirit and / or Succor. This decision will also depend on the optional skill the Tanker takes in the variant slot, as mentioned above, based on his build's energy demand.
The Bonder shall have Signet of Devotion, which is superior than Essence Bond, because the Tanker will not be under attack 100% of the time and you will have difficulty to up-keep 4 or more bonds, specially if also bonding other characters like in the final chamber versus Urgoz.
Player or Hero[edit]
Since the Bonder has high specs in Protection Prayers, Aegis is a favourite to fit between the 4 optional slots, mostly together with Echo to have two copies. This is something that only Players can handle. Heroes will fail because their AI will be spamming Blessed Signet, which cancels Echo. So instead of having Echo, better take other alternatives like Ward Against Foes.
EoE:[edit]
Edge of Extinction is very useful during the whole run, and vital at the final fight. This spirit will be best taken by a back-liner so that is not killed by foes. Several team builds will recommend a bar that uses 3 different attributes, lowering Beast Mastery to 8 - 9 - 10 for "innovation" purposes. But that is a mistake, since this skill will be key to defeat Urgoz, the more damage it can deal, the better. Mostly because the entire party will be against the explosion fatalities clock. A Player should be able to re-cast it after the previous one dies, but a Hero will not because the character will be out of combat and the AI won't notice a battle is taking place.
But because the EoE bearer has 12 or more points in Beast Mastery, that doesn't mean Pet rangers are welcomed. The animal companion has a high chance of screwing the Tanker's aggro balls or accidentally aggroing foes to the main team. Except for the traps, ranger is the less fitted for this Elite Mission since the main team can simple kill foes behind walls where projectiles would be blocked.
Melees[edit]
No place for melees in here, avoid having characters of this profession. They have very hard armor but also very hard heads. Players that use warrior, assassin or dervish have trouble to understand Positioning:
- When a Tanker is bringing the ball and preparing for spike signal. Melees tend to stand ahead of the main team and it takes several instructions to make them understand why to step back, which is very annoying and time consuming.
- When a Tanker is almost standing to signal spike. Melees tend to rush in out of sync and start attacking foes that the main team fire power cannot reach, wasting overall attack strength. In the worst cases they will keep on chasing further forward with auto attack, aggroing and dying only to then complain "-Heals?-".
- When the main team needs to fall back. Melees will usually target a monk and press
Spaceto auto follow, bringing the aggro to their rezzers instead of just dying there.
No 100b warrior, no VoS dervishes and no Squashy sins.
Several of the Tanker's ball spikes are placed within Environmental Effects because foes cannot be pulled more than that or they will start retreating back to their original position, which is why casters are favourite here. Any spike that takes place under Weakness will make melees obsolete. Not to mention those melees who think they can tank too and won't listen, extending the runs time one hour more than what it usually takes.
Monks[edit]
WARNING:
Monks make a very typical mistake and funny enough its common in both Players and Heroes.
Permasins do NOT need heals.
Any monk that casts Seed of Life or Healing Seed highly risks transferring ALL the Tanker's aggro ball to himself/herself which can result in immediate party wipe. The AI can make this mistake... but humans please don't. Even if the Tanker would be the best way to take the most benefit from these skills... this error may result in the entire death of the team.
There is need for ONLY two monks in team, having a third healer will leave the others with nothing to do, wasting a team member slot that could be taken by a damage character.
Having to take care of other 9 characters may seem too much work but most of the incoming attacks will be countered by the EoE bearer ST character with Displacement, Shelter and Union. Plus any other character playing Control or Support: Template:Team Roles nav.
Recommendation:[edit]
- Two standard UAs will do. If heroes, replace Heal Party with Divine Healing and / or Heaven's Delight. They will have good energy management if secondary mesmer with either Leech Signet, Power Drain.
Mesmers[edit]
Five elite skills are of good choice here:
However, having too many Control characters will leave the main damage team very week (unless playing Cryway), the whole party may reach the end boss, but will have low fire power to finish him usually frustrating all efforts.
An Ineptitude Mesmer is a must due to two known Thorn Wolves bugs :
 Bug.Die As One: When a Tanker is triggering hidden pop-ups, the first group's AI will behave normally. But the subsequent spawns will NOT. Since the pop-ups are chained, it's like if all groups that spawn after the previous one had been eliminated..."share a single mind/destiny". When the Tanker goes in again to trigger the second, third... pop-ups; these will not ball-up on the Tanker but run straight to where the first ones had died (example: "look: they..."). This means that the main team will be open to attack. So Blinding them all with Ineptitude secures everybody else.
 Bug.Pop-star Revenge: As much as a Tanker may scout for more hidden spawns, sometimes, they won't all spawn. Which seems fine for most teams. But if for any reason some or a few players need to backtrack...its only then when these "no chance to appear on TV pops" will spawn to surprise players without the Tanker or healers nearby.
Energy Surge is a good variant if the team lacks Elementalists. But Visions of Regret, Shared Burden and Panic players will become useless versus Urgoz and so, any team making guide player will need to balance the overall set-up, since these last hexes do not deal direct damage and won't help in triggering EoE's damage effect.
Elementalists[edit]
Any team can have as many professions they want. My recommendation is to take at least a minimum of 4 Elementalists. The faster the team kills, the faster the Tanker can go ball-up the next set of foes. Remember that Urgoz's Warren is different than other Elite Areas or Dungeons, in that the next group of enemies will only pop-up once the previous ones had been killed. Until then, the tanker won't be able to aggro anything. Ideally, the Tanker shouldn't have to wait too long.
DoT Spells[edit]
DoT, means: Damage over time. These skills that create an effect on a same area for a few seconds have the negative effect of causing enemies to scatter. When foes spread out, they become harder to kill than having them all cloistered together at one spot. Because of this, it's best NOT to take too many DoT Spells. However, for the exceptional tactic to defeat Urgoz, having one or two will come very handy. But please don't use these skills on the Tanker's aggro-ball or all efforts will be wasted and once foes escape in different directions, enemies will start attacking several team members making it hard for the healers.
| ||||||||||||||||||
| A 40/40 Fire magic set |
| Skill Attribute | DoT Spell | AoE Spell |
|---|---|---|
| Fire | ||
| Fire | ||
| Air | - | |
| Air | - | |
| Water | ||
| Water | ||
| Earth | ||
| Earth |
Base your teambuild strongly on AoE Spells for the entire run but keep 1 or 2 DoT Spells vs the end boss. Some DoT Spells are handy, like Deep Freeze. But remember not to use DoT spells until the last fight. In the final fight versus Urgoz, spike spells will be more effective to lower his health below 90% faster than DoTs. Meteor Shower chained by 4 players/heroes will be a blast but ensure using Glyph of Sacrifice first or you will be interrupted by an Explosive Growth and most possibly killed before ever getting a chance to land an attack. Equip a 40/40 set.
Necromancers (fillers)[edit]
Depending on the entire team build composition, there will be none to one or maybe two spots left:
- A party with too many heroes could take a MM.
- Spiteful Spirit is a nice choice.
- BiP, as known as Battery is not needed. Neither Consume Corpse or Necrotic Traversal since the last game update mentioned at Section 0 and Section 3.
Paragon (fillers)[edit]
Depending on the entire team build composition, there will be none to one or maybe two spots left:
The only choice for a Paragon would be... yeah, Imbagon. The problem is... the team build already has a ST Ritualist and possibly some Mesmers... if there already is a Panic, you are screwed all over and twice. Anyways, if they still let you in... your presence would be most appreciated for the IMSes like "Incoming!", "Fall Back!", Godspeed and a must skill for you will be "We Shall Return!" for the final fight where you could become the last hope.
Ritualists (fillers)[edit]
Depending on the entire team build composition, there will be none to one or maybe two spots left:
- There will already be the irreplaceable ST Ritualist, so the cloned SoS would be good to hold off enemies if there ain't a MM Necromancer in team already. Have both Destruction and Rupture Soul, cast the spirit when the Tanker goes to make aggro-balls and use Summon Spirits with RS to blind them all.
- A third Ritualist is multitude but since there's too many people depending exclusively on this turtling, a pure Communing Spirit spammer could do as long as they don't have copies which will end up canceling each other.
- A Restoration variant will literally leech the monks. But if they are inexperienced or only count with a single monk, then you might be welcomed. Careful skill selection here, must have: Blind Was Mingson, Life, Lively Was Naomei (AoE Resurrection), Preservation (will be the best choice ever for the final fight by healing others while hiding in a safe spot) and Protective Was Kaolai.
What is Safeway?[edit]
This is a personal concept which took place after people talked I could lead/guide runs, always get the End Chest and started to mass-poke me. Through time, I began to apply this methodology to avoid the typical 1 hour set-ups just standing in the outpost and doing nothing but arranging the builds of players who can't put-up 8 skills to create a build that makes sense by themselves and need parental treat. Title skills are good, but many players can't get them (e.g.: IAU) so if you have them unlocked, go ahead and mix them in. My only advice is to avoid at all Asura summons/EVAS which can screw-up aggro-balls just like allies created by Summoning stones.
The builds have a more natural "feel" that can identify the profession's natural design and are easily understandable without need of explanations like Speed Clear teams.
The risk factor is minimized favoring survival to avoid party wipe.
For Treasure Hunters (alternative paths):[edit]

|
Under Construction:
This section will be pending, check periodically for updates. |
Depending on the Speed Clear, the fastest way to the End Chess is what matters most. But in Urgoz's Warren, looting takes priority. Any single Locked Chest around can give you a Zodiac Weapon, even the Inherent modifiers weapons can sell for 80![]() ~ 100
~ 100![]() ... why not clear an extra or alternative room for it, right?
... why not clear an extra or alternative room for it, right?
