Character Sheet without Template[edit]
| Characters |
Players I Know |
My Guild |
Talk Page
|
| Jack of Diamonds
|
| Name: |
Jack of Diamonds
|
| Health |
250
|
| Weapon |
Club
|
| Pet |
Dog
|
| XP |
10,000
|
| Armor |
Leather
|
| Title |
- Defender of the Crown
- Jack of All Trades
- Moron in Waiting
|
|
|
| Queen of Clubs
|
| King of Hearts
|
| Ace of Spades
|
|
|
| My Awards
|
- If you look at the code it uses variables like a template but is all in one shot. Trim is used to remove the white space at the top (took a while to figure that one out) and now this makes it easy to edit the page since all the important data is at the top.
{{trim|
{{#vardefine:CN1|Jack of Diamonds}}
{{#vardefine:CN2|Queen of Clubs}}
{{#vardefine:CN3|King of Hearts}}
{{#vardefine:CN4|Ace of Spades}}
{{#vardefine:Health|250}}
{{#vardefine:Weapon|Club}}
{{#vardefine:Pet|Dog}}
{{#vardefine:XP|10,000}}
{{#vardefine:Armor|Leather}}
{{#vardefine:Titles|
* Defender of the Crown
* Jack of All Trades
* Moron in Waiting}}
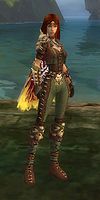
{{#vardefine:CImage|User Jabhacksoul Single Shot Sally.jpg}}
}}
{| border="1" cellpadding="5" cellspacing="0"
|-
! Characters || Players I Know || My Guild || Talk Page
|-
| {{#var:CN1}}
| colspan="2" rowspan="5" align="center"|
{| border="1" cellpadding="5" cellspacing="0"
|-
|'''Name:''' || {{#var:CN1}}
|-
|'''Health''' || {{#var:Health}}
|-
|'''Weapon''' || {{#var:Weapon}}
|-
|'''Pet''' || {{#var:Pet}}
|-
|'''XP''' || {{#var:XP}}
|-
|'''Armor''' || {{#var:Armor}}
|-
|'''Title''' || {{#var:Titles}}
|}
| rowspan="5" align="center"| [[Image:{{#var:CImage}}|100px]]
|-
| {{#var:CN2}}
|-
| {{#var:CN3}}
|-
| {{#var:CN4}}
|-
| <!-- empty row -->
|-
| colspan="4" align="center"| My Awards
|}
Layered Images in Inkscape[edit]
(All images saved offsite)
I use both Gimp and Inkscape and prefer Gimp, but for some reason, I was asked to do up a tutorial in Inkscape. The first thing you need to understand about layers is how they work. Tend to think of each layer as clear glass you paint on. Depending on the order you stack them in certain areas won't show through. In this example I will import my Shanea Whisperer image. After loading you will notice a little edit box in the lower left that reads Z and a percent. If you hover over this you can scroll in and out using a mouse wheel or you can hover over the image and use + and - on the numeric keypad.
Next you need to bring up Layers either navigate the menu or press (Shift+Crtl+L) as in figure 1. At this point I import the image. figure 2 figure 3
Do not open it you want to import it directly into the layer. You can make sure it is on the layer by clicking the eye icon open for visible and closed for invisible.figure 4 Red (Mrs. Black) showed me what she did with Su Duko and the Baron. To do this in Inkscape you need to zoom at least 200% to 400% on the image. Select an X point (I used 230 as my guide) and using the Bezier tool figure 5 cut around the object that "pops out" of your frame. Then I took it down to the bottom edge of the image, to the far right corners, back up to the top. Once completed your image will have a black line running the full path. figure 6 Containing everything you want to keep visible. From the menu choose Edit, Select All and from the menu choose Object, Clip, and Set.
Looks like your done? Not quite, you need to Export Bitmap (Not Save). figure 7 Make sure the layer is selected then from the menu choose File, Export Bitmap (Shift+Crtl+E). figure 8 In the popup box choose Selection and Browse for the file name and save file type as PNG. figure 9
As I told Red, Inkscape is a great tool for Vector graphics and the Gimp is best used for Raster graphics. But if you don't want to take on the Gimp or already have learned Inkscape this should work for you. If you desire to eliminate the whole background you really should look into using the Gimp and a color masking program.
