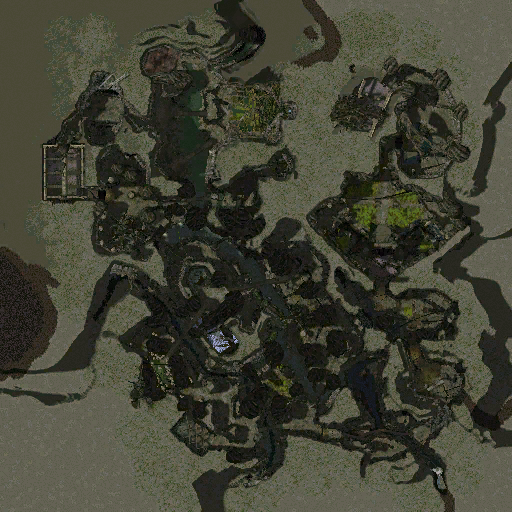
- Room 0 / Entrance tunnel and outpost area
- Room 1
- 4 groups of patrolling Dredge rush towards the stationary group of Dredge a short time after players enter.
- Killing the Twisted Bark will stop the Weakness effect.
- There are hidden Greater Blood Drinkers in the side passages, which can be avoided by heading straight towards the Guardian Sepent.
- Killing the Guardian Serpent will allow access to room 2.
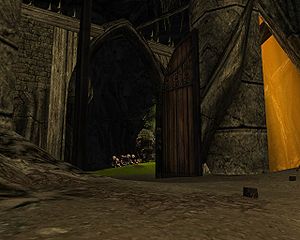 Second archway, foes beyond it. - Room 2
- There is heavy degeneration in this room beyond the first gothic archway, flagging your heroes here will reduce their healing work.
- There are 3 groups of visible Dredge and numerous spawns of Greater Blood Drinkers beyond the second gothic archway
- Lure the two closest groups of Dredge towards room 1 and kill them.
- Walk past the second gothic archway to trigger the appearance of Greater Blood Drinkers and pull towards room 1.
- Kill the Twisted Bark, followed by the third group of Dredge.
- Move slowly to the Guardian Serpent, killing all the hidden Greater Blood Drinkers.
- Room 3
- Pull the two groups of Plants into the doorway and kill them.
- Proceed slowly through the area (bear in mind the traps laid down by the Brooding Thorns).
- Kill the Dredge and pull the two levers to open the next room.
- Room 4
- There is a group of Thorn Wolves a short way along this bridge. After killing them, setup a spirit decoy at the entrance to the bridge.
- Proceed to the next Wolf spawn, kill them.
- Moving further along the bridge will spawn a third group of Wolves, kill them and then kill any remaining Hopping Vampires/Thought Stealers that spawned at the start of the bridge by your spirit decoy.
- Continue to the end of the bridge, where another group of Hopping Vampires/Thought Stealers will spawn.
- Kill the Guardian Serpent to continue to room 5.
- Room 5
- This is the only Twisted Bark that it is recommended not to kill, since teams would have to fight within the Exhaustion effect.
- There is an exhaustion causing effect within this room, so pull foes to the doorway where there is no effect.
- There are 4 Thorn Wolf groups hidden in the first chamber. Once they are dead, follow the left wall through the first vine gate and onto the bridge. (Consider disabling non-essential hero spells to avoid exhaustion, leave signets, attacks and spirits enabled, as well as healing spells.)
- Kill the Thorn Wolf group behind the second vine gate at the end of the bridge.
- Move to the third vine gate, close to it there is no exhaustion effect and you can recuperate your exhausted energy.
- Clear this chamber in a manner similar to the first chamber, pulling the 2 groups of Thorn Wolves to your party.
- The third chamber with the 2 Brooding Thorns also has 2 groups of Thorn Wolves. Head west afterwards into the valley with the large mushrooms.
- Room 6
- Proceed slowly, killing the 2 Thorn Wolf groups on your way to the north-east across the bridge. At the other end of the bridge is a chamber with three visible Brooding Thorns, and more hidden Thorn Wolves.
- Station your party at the end of the bridge and move to the right towards another vine gate leading south, kill any Wolves that popup as you go to the exit vine gate.
- Head through the southern vine gate towards what looks like a wall of crystals, then follow the passage around until it turns north.
- There are 2 Thorn Wolf groups here. Kill them and then either flag a hero or tell a party member to wait here until further notice.
- Room 7
- Leaving 1 hero or party member behind, kill the next Guardian Serpent and enter the next room, and then kill the Twisted Bark creating the -4 energy degeneration effect.
- Then kill Guardian Serpent 5 to open the gate. Continue all the way across the bridge until Wardens and Plants spawn in the next room.
- The party member that was left behind can now rejoin the team.
- Not flagging a party member results in the spawning of several tough Warden groups, and the appearance of some Hopping Vampires/Thought Stealers on the exit bridge to room 7.
- Room 8
- There are 2 groups of Plants and 4 groups of Wardens in this room. There is an exhaustion effect emanating from the southern Twisted Bark, and a weakness effect from the northern Twisted Bark.
- Pull the first group of plants out of the effects, towards the bridge you just crossed. Kill them.
- Repeat this with the closest Warden group. Continue to pull Wardens out of the room until all near patrolling groups are dead.
- Pull out the second group of plants. Finish off any patrols.
- Eliminate the southern Twisted Bark - you can position your party at the entrance of the room, walk up to the bottom of the cliff, and all the foes will run around to meet you, walk to the entrance to use your party to kill them. Then kill the lone Twisted Bark. Watch out for traps in the narrow passage.
- You can repeat this process for the northern Twisted Bark, or you can continue to the Guardian Serpent to access room 9.
- Room 9
- There are stationary Plants and 6 Warden groups. This is the first room with Maddened Earth Wardens.
- Pull groups of Wardens out of the room up the stairway, use the arch and corners to ball foes.
- Kill the Guardian Serpent to access room 10.
- As with room 6/7, leave one party member behind in the passage between room 9 and 10 so that the doors do not close and the foes do not overpower your party.
- Room 10
- Clear the Greater Blood Drinkers and Thorn Wolves slowly. Once you defeat one group of foes, another group will spawn. Continue slaughter until the doors at the far end of the room open.
- The waiting player/hero can now rejoin the group.
- Not flagging a player/hero will result in the doors closing, and an increased chance of defeat due to the foes popping up.
- Proceed down the slope to the Twisted Bark, killing it will remove the degeneration effect.
- Crossing the bridge to the Plants will spawn another small group of Brooding Thorns beside the Serpent. Kill them and the Guardian Serpent to open the final door to Urgoz.
- You can kill the four additional Guardian Serpents to open some additional doors, chests can spawn in the rooms populated with Wardens behind the doors. The two Guardian Serpents to the right and left of the central Urgoz door can be killed with ranged damage from the central ledge.
- Room 11
- If you did not kill the Twisted Bark in room 7, you will encounter -4 energy degeneration in the southern half of Urgoz's chamber.
- Urgoz lies in the center of the room, beside two Greater Serpents that don't usually heal Urgoz - they will cast Scourge Healing however so the party may consider spiking them down quickly.
- Beware the combination of Forest's Binding with the Explosive Growths which cause 300 damage when they die after 3 seconds and knock down adjacent foes.
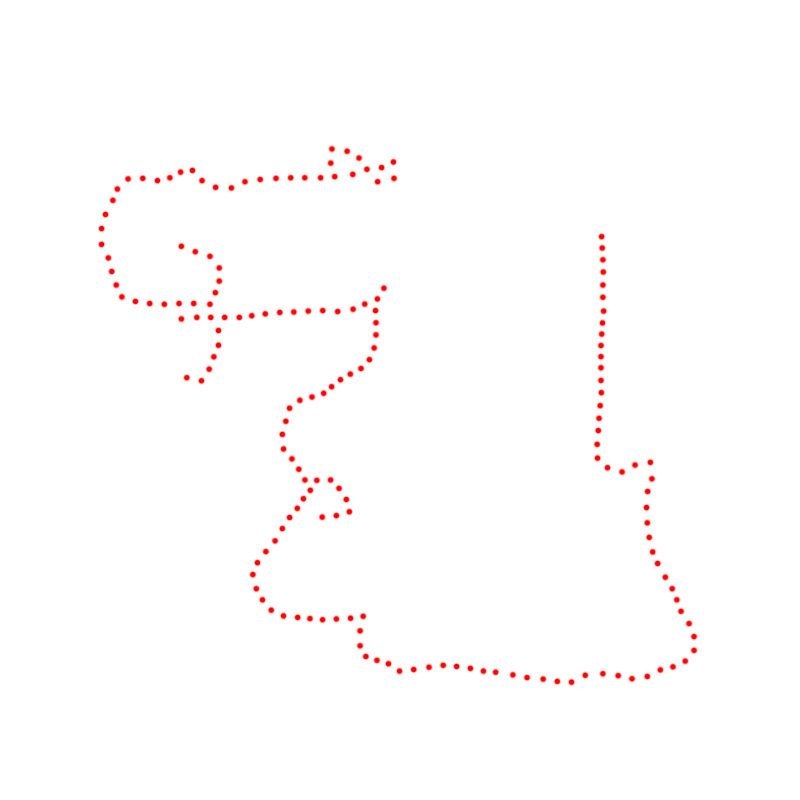
- If using EoE, place it within spirit range of Urgoz at the bottom of the rock formation north of the central door. (see image)
- Killing Urgoz spawns Urgoz's Chest, which holds a reward for each player. There is a teleporter back to the outpost at the far end of the room, using it will leave your party.
|
|