Frozen Isle
| Frozen Isle | |
|---|---|

| |
| Region | Shiverpeak Mountains |
| Environment Effects | Icy Ground |
| Map | |

| |
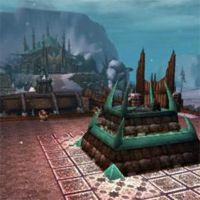
Frozen Isle is a Guild Hall introduced with the Prophecies-campaign. This Guild Hall is inspired by the Southern Shiverpeaks.
Layout[edit]
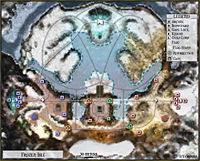
This Guild Hall has two bases opposite each other in a straight line. From both bases, there are three paths onto the rest of the map: A western path that leads straight to the opponents' base through two gates, that are independently operated by Gate Levers on a dais located in the center of the map (slightly off-center to the west), a middle path that leads to this dais over a bridge and through another gate, which is shut when the battle commences. From the start, it is not possible to use this path to get anywhere. Lastly there is an eastern path leading onto the ice, from where a team can go to the flagstand, towards the dias with the Gate Levers or even straight to the opponents base.
Map mechanics and rewards[edit]
- This map features areas with ice. This Environment Effect comes into play when a team member stops on the ice.
- Two gate levers located on the central dias control the gates to each base. Using the lever will alternate which gate is open and which gate is closed. The southern lever controls the southern gates, while the northern lever controls the northern gates.
- In addition to these rules, this map follows the standard rules of a GvG.
Strategy and tactics[edit]
Due to the multiple paths, gates, wide open large areas and ice this map has always favored split tactics heavily. The start of the match often varies heavily depending on what kind of build each team is running. 8v8 teams on this map commonly head to the raised dias with the levers, often called the gatehouse. Sometimes 8v8 teams also send everyone to the flagstand, but this makes it difficult to respond to any team that decides to attack the base immediately. Heavy pressure 8v8 teams with little split capability such as heroway teams have also been known to attempt to send the entire team in through the back door immediately from the start to attempt to kill the guild lord very early and secure victory. This tactic is risky and can be defeated by a team that makes it to the gatehouse first and shuts the gate before the enemy team can get through it forcing them to run the long way around while the team at the gatehouse has the option of intercepting them or pushing directly into their base. Being a split favored map many different splits are seen on this map, quite often with teams splitting into three groups at the start to secure the flag stand, retain some control over the gatehouse and push into the enemy's base all at once.
Defensive team[edit]
Outer archers provide very little defense and are easily ganked. They are isolated from each other and the lord pit. The lord pit is small and enclosed. These features make this base quite difficult to turtle inside so a team forced to defend will find itself at a disadvantage. The multiple entrances and size of the bases make it possible for splits to push one side of the base while the other is being defended. The resurrection shrine is also quite far from the lord pit making it difficult for a team to regroup after base rezzing. Height advantage can be used while base defending and teams trying to pull out over the ice may find themselves snared by their environment so resurrection timers and positioning needs to be watched to allow split teams to pull out early.
Offensive team[edit]
The offensive team's base is essentially identical to the defensive team's.
Disputed areas[edit]
The ice is one of the most important features of this map. While on the ice anyone casting a spell or knocked down will find themselves snared. This increases the power of skills that knockdown as they will add a snare as an aftereffect if someone is knocked down on the ice. It also makes it difficult for support characters such as monks to support their team while falling back or advancing.
Gate control can be critical to victory or defeat and as such, a lot of the fighting occurs here. Properly controlling the gates can waste a lot of time for opponents by making them go around the long way while allies can go through the shortest route. There is a bluff which faces each back door from which the outer archers can be reached using a long or flatbow.