Cold Vengeance
| Cold Vengeance | |
|---|---|
| Section | Depths of Tyria Quests |
| Campaign | Eye of the North |
| Given by | Latham in Jaga Moraine (Depths of Tyria) |
| Type | Secondary quest (Difficulty: Master) |
| Map(s) | |
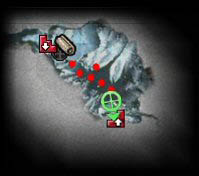 Level 1 | |
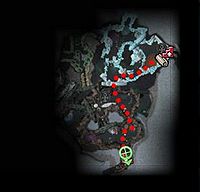 Level 2 | |
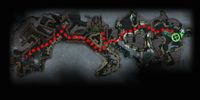 Level 3 | |
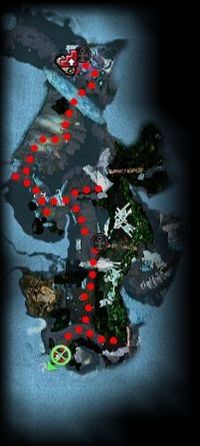 Level 4 | |
 Level 5 | |
Accompany Latham on his quest for vengeance against the giant wurm that killed his brothers.
Quest information[edit]
Objectives[edit]
- Travel through the wurm's lair and destroy Frostmaw the Kinslayer.
- Speak with Fastulf and discover his findings.
- Destroy Frost Larvae within the wurm's lair to enrage Frostmaw the Kinslayer and force her to appear.
- Exact revenge on Frostmaw the Kinslayer for all the Norn she and her offspring have killed.
- Convince Latham to share the glory of the kill.
Reward[edit]
- 10,000 Experience
- 2,000 Gold
Walkthrough[edit]
Level One[edit]
This level is fairly straightforward and the exit to the next level is very close. There are a lot of mobs and snowballs along the way, therefore it is advisable to tread slowly, and pull each mob to prevent the party from getting overwhelmed. The area map for this level is unnecessary, but can be found by the entrance door.
Level Two[edit]
Upon entrance, a player may find an area map nearby. Near the bottom of the icy area Frost Wurms and Frostmaw Spawns will popup. Just outside of that room, there will be a group of Chromatic Drakes, Frozen Elementals, and a Frostmaw Spawn. It is essential, especially in hard mode to carefully pull each group to prevent a party wipe.
The portal to level 3 can be approached from either the left or the right path. The path to the left has (3) popup mobs of Stormcloud Incubi (8 to 10 total) which appear just past the doorway into the final chamber. Careful sweeping and pulling can prevent a party wipe, but the path to the right is safer with less popups. Combined mobs of Frozen Elementals and Chromatic Drakes in the confined corridors of the right hand path, can easily wipe an un-prepared party without careful pulling. This path does offer at least (3) Light of Deldrimor treasures, scattered throughout the passages.
Level Three[edit]
Keep left on entry. The first open area will contain Ice Imps, Frost Wurms, 3 large mobs of Whirling Wisps, Frozen Elementals, Ice Imps and a Frostmaw Spawn. Frost Siege Wurms and the Frostmaw Spawn tend to popup while attacking any mob near the entrance to the level. This area leads to a path with a side hallway on left. This left hallway is a dead-end but contains an area map and a collection of Dwarven Powder Kegs. The kegs can be used to break down walls but are not necessary. When the wurms near each wall are defeated a large snowball spawns and crashes into the wall, breaking it down. The path leads to a small open area to the north which can be bypassed. To the east, the path forks north and east. The fork is guarded by 3 mobs of popup Stormcloud Incubi, which should be carefully sweeped and pulled. The northern path contains a number of wurm popups and leads to a Beacon of Droknar. The eastern path leads to more wurm popups and a large empty chamber to the south. The next chamber to the northeast is guarded by Ice Imps, Frozen Elementals, Whirling Wisps, more mobs of popup Stormcloud Incubi, as well as 2 more popup groups of Frost Wurms and Frostmaw Spawn. Careful pulling here is advised to prevent a party wipe. When the last of the wurms guarding the cracked wall blocking the exit to the 4th level is defeated, a snowball will spawn and break the wall down.
Level Four[edit]
Upon entrance, the area map is on your right. Since approaching the Siege Wurm causes another Frost Wurm to spawn, carefully pulling the Incubi and the Mandragors away from the wurms is recommended. It's possible to hide behind the ice to prevent the Siege Wurm from hitting you while you bring down the other wurm. Past the ice bridge, a Frostmaw Spawn will popup so it's best to pull the Mandragors across the bridge and dispatch them separately. Run to the right past the Icy Stalagmite into the next chamber and ignore the Siege Wurms if you can. From the next doorway, a group of Siege Wurms are visible, accompanied by Mandragors. Lure the Mandragors away, and kill them while out of range of the Siege Wurms. Next, a group of Jotun are guarding the path to the Level 5 entrance. You need to pull the Jotun away from their post since a Frostmaw Spawn and one or more, Frost Wurms popup and aggro with them. It is best to attack from the hillside to the right of the Jotun spawn. Finally, the gate itself is guarded by two Icy Stalagmites.
Level Five[edit]
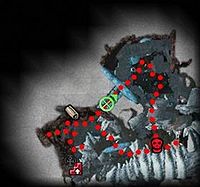
The area map is in the top left corner of the cavern. To make Frostmaw the Kinslayer spawn, you will need to kill the Frost Wurm Youngs and Frost Wurm Larvae, which will make her appear along with 2 Frostmaw Spawns and 3 Frost Siege Wurms. Once Frostmaw is dead, a reward chest will appear. (You are not required to kill all of the siege wurms, although it does make it easier to reach the chest and claim the quest reward from Latham.)
General suggestions[edit]
- Dust rises and the ground starts to shimmy and shake as Frost Wurms and Frostmaw Spawns approach. You could try to avoid your entire party being covered in Wurm Bile by using one player as a lure while the others back away: the wurms will concentrate on just that character and the rest of the party will avoid the area of effect of Wurm Bile (which is point-based rather than targeted).
- These wurms tend to remain for a while before moving to your party's new location; this usually gives you enough time to kill them.
- Bring Lockpicks and/or Light of Deldrimor; this dungeon is rich in chests and Hidden Treasure.
- Proceed carefully to avoid the numerous popups.
- As with any quest allies, the accompanying Norn NPCs can be difficult to control. However, they are extremely sturdy and self-resurrect, making them ideal meat shields.
Threat assessment[edit]
- Frostmaw does not regenerate health; you can keep whittling her down even after accumulating a high Death Penalty.
- Keep spread out; most of the foes on this level deal significant AoE damage.
- In the final chamber, there is a safe spot (near a gate) that you can use for staging your assault. Attack the siege wurms from there and pull back; Frostmaw and her spawns will chase you, allowing you to divide and conquer.
Skill recommendations[edit]
- Bring hex removal skills: Wurm Bile is deadly unless countered by removal, regeneration, or lots of healing. Complicate counters the bile. Hex Eater Vortex, Inspired or Revealed Hex are ideal; the latter two recharge immediately when removing monster skill hexes. Alternatively, Withdraw Hexes removes all hexes from a cluster of allies.
- Bring skills that prevent knock down (e.g. "Don't Trip!") to prevent being hampered by mobs of Wurms and Jotun.
- "Can't Touch This!" to counter air elementals and Mandragor.
- Wurms and Jotun are themselves immune to knock down; Earthbind is the only skill that can bypass that immunity.
- The elemental mobs are vulnerable to fire-damage, however there are many spirits of Winter throughout the dungeon that convert elemental damage to cold damage.
- Nature's Renewal to mitigate damage and aid in interrupts; avoid using any hexes and non-dervish enchantments. When taking on the wurm mobs, put down Nature's Renewal, flag your team a bit closer to the fight, and then pull solo with a bow getting the agro on you/allies. This helps to keep the wurms from going after your casters and the NR spirit.
NPCs[edit]
All levels of Frostmaw's Burrow, follow party.
Allies[edit]
Dialogue[edit]
Initial dialogue[edit]
- Latham
- We were on a hunt, my brothers and I, when the ground shook and heaved beneath our feet. It was as if the earth itself became wracked by a death rattle! I was tossed into the air and slammed against a mighty tree. When I awoke, the smell of blood was thick on my tongue. I found my brothers, torn to pieces, a giant frost wurm ripping the flesh from their bones. I could only watch, sick with horror, as the beast finished its meal and descended into its lair. I swore I would avenge my kin or join them. My destiny and my honor are linked to that creature, in life or death.
Intermediate dialogue[edit]
- Fastulf
- Don't linger over my wounds. Death comes for me, and I welcome its cold embrace. If you seek the ghastly wurm, you must lure her from the mountains. Frostmaw and her children feed on the rats infesting this place. Use them to lure the wurms out where you can kill them. Beware! That raging abomination has sent many hearty souls to their deaths...but you are determined, yes? May your passing be glorious and quick.
Reward dialogue[edit]
- Latham
- My brothers are avenged at last! Many songs will be sung of our deeds, [Character Name]. I must hunt down the remaining wurm younglings hiding in the mountains. You shared in Frostmaw's downfall. Rest assured that your name will not be forgotten.