Isle of Meditation
| Isle of Meditation | |
|---|---|
| Region | Shing Jea Island |
| Environment Effects | Fireball Miasma |
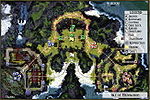
| Map | |

| |
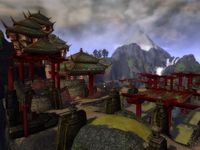
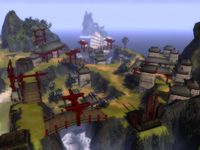
Isle of Meditation is based on the Shing Jea Island, this large guild hall is the largest of all available guildhalls and was added with the addition of Guild Wars Factions.
Layout[edit]
The hall consists of one base themed to look like the Shing Jea Monastery and the other which resembles Tsumei Village. Two main paths connect the two bases, a bottom path along the beach which contains the Tower Flag Stand statues which will fire Fireballs at the team that does not control the Obelisk Flag Stand. The obelisk flag stand can be found inside an enclosed compound on the upper path on the top of a bluff surrounded by three gates. The northernmost gate can be opened from the outside while the two gates closest to each base can only be opened by operating the gate lever inside the enclosed compound. The path to the northernmost gate is covered in Miasma from both sides which causes temporary but un-removable Health degeneration that spreads like Disease.
Map mechanics and rewards[edit]
- Miasma adds five pips of health degeneration, cannot be removed and spreads between adjacent targets.
- Capturing the Obelisk Flag Stand causes the statues on the bottom path to fire Fireballs at the other team.
- The gates on the top path can only be opened by operating the appropriate gate switches.
- In addition to these rules, this map follows the standard rules of a GvG.
Strategy and tactics[edit]
This hall provides excellent opportunities for splitting due to the large distance between the two paths and the relative difficulty of base defense. Pressure builds can also do excellently on this hall due to the additional pressure added from the statues on the bottom path which can be sufficient to push a heavy pressure situation into a full team wipe. Matches very typically start with skirmishes on the top path to try and secure the Obelisk Flag Stand first.
Defensive team[edit]
The footmen and archer outside the top gate are very exposed in an open area with no good options for a flagger to turtle while keeping these NPCs alive. Once these are dead there is almost no defensible position between the back door and the lord pit. The resurrection shrine is far away from the lord pit which means that teams which partially base rezz can be separated and easily killed while trying to regroup. Most of the NPCs are very poorly placed to defend the base in general.
Offensive team[edit]
This base is practically speaking identical to the defensive team's base.
Disputed areas[edit]
Rangers and flag runners can still assist in any action happening at the tower flag stand from the clifftop near the Obelisk Flag Stand so it is common for a ranger or flagger to be standing up there to prevent the Obelisk Flag Stand from being captured. The effect of the Obelisk Flag Stand may not seem large, but it can often be the last straw which causes a team to collapse to pressure so control of the statues should not be entirely dismissed. The miasma on the back path needs to be considered during splits as split teams will be pressured when they arrive and will take pressure when they try to escape because of it. Forcing a split team to retreat through the miasma when they are under heavy pressure can easily cause a split to wipe. Split teams need to bear this in mind and either have control over the gates or be prepared to fall out early.

