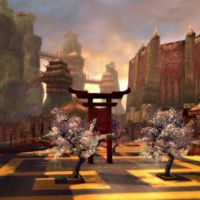
Imperial Isle
| Imperial Isle | |
|---|---|

| |
| Region | Raisu Palace |
| Environment Effects | Acid Trap |
| Map | |

| |
Imperial Isle is a guild hall inspired by Raisu Palace. It was introduced with the release of Guild Wars Factions.
Layout[edit]
A completely symmetrical map, Imperial Isle is set up with each base containing two exits, each leading to a different corner of a humongous central room. The flag stand is at the center of the map. On each side of it, a ramp leading to the flag spawn, a teleporter to the other side, and a path to the enemy's back door.
Map mechanics and rewards[edit]
- Flags on the Imperial Isle spawn outside the bases in a narrow acid-trapped corridor. Acid Traps deals 20 armor ignoring earth damage per second. Putting enough Death Penalty on the enemy flag runner will ensure that they cannot reach the flag easily due to Acid Traps.
- On each side of the Flag stand is a ramp with a one-way teleporter next to it. These teleporters move players to the opposite side of the flag stand. This makes the ganking process easier, as you can trick enemies into going somewhere that you in fact do not intend to go. You will not drop a flag walking through these teleporters.
- In addition to these rules, this map follows the standard rules of a GvG.
Strategy and tactics[edit]
Imperial Isle is all about movement control. It features an extremely strong base defense, a wide open center area, teleporters that can be used to gain a movement advantage, and a flag located outside the protected area. This favors teams that can move well and fight in small groups -- not necessarily dedicated splits such as you would see on Frozen Isle or Corrupted Isle, but rather a team with good awareness of positioning and appropriate powerplays. Both teams have a very strong defense on this map -- the team that wins will be the team that can control the center area and thus morale boosts, usually by strong 8v8 play AND the ability to fight in smaller groups to kill runners, pick off NPCs, and so on. It is very common on this map to push the flagger hard and attempt to snare flaggers in the acid. Flaggers have to choose between going the short way straight into the thick of combat or running around the long way to avoid being pushed.
Defensive team[edit]
The front door is reasonably well defended, but the back door only has two archers between it and the lord pit. Because the flag is outside your base and because the flag stand is so far away, it is impossible to utilize the damage from your NPCs as you push a flag, unlike many maps, such as Wizard's Isle
Inside your base, you have two "anti-movement" archers to defend your chokepoints. Unfortunately, like the archers on your elevated platform, they will die quickly to a ganker unless defended well. But when defended, they can provide great cover fire and be very difficult to crack.
Your inner area is likewise very well defended. It is difficult for a ganker to aggro the knights without accidentally aggroing more than one, and it is common to mess up and get pinned down either by the inner archers or by the platform archers. Gankers be wary! The inner area has clean line of sight for your archers and is also connected by a choke point, making it a great location to push back out on a team that pushes themselves too hard trying to break your turtle.
Offensive team[edit]
The Offensive team's base is practically identical to the defensive teams.
Disputed areas[edit]
The center area is about as straightforward of an 8v8 fight as you can get. There are no major obstacles and everyone has a lot of room to kite. Finally, because of the gap between the flagstand and the NPCs, it can be difficult to fall back to safety and thus a few deaths often results in a wipe. Strong 8v8 play is essential on this map.
Because of the acid and the fact the runner is exposed, this map is also commonly used to harass and kill runners. For example, an offensive player might attack the runner in the acid so the extra DPS helps get a kill. He might then use the teleporters to escape a collapse or begin to pick off NPCs. Flag Runners should prepare for this maneuver by getting to the flag quickly and staying out of casting range of any opponent trying to hunt them down in the acid trap. Monks can move in below and heal runners walking along the outer edge of the acid corridor. Inexperienced runners frequently make the mistake of waiting too long to cap a flag after the other team caps because they underestimate the sheer distance they have to run (much farther than most maps). However, because the middle is so open, bodyblocking is very difficult.
When pushing into the other base, be very careful. It is very common for a team to win the flagstand, then push in too hard only to wipe inside the other base.
Notes[edit]
- The same hall is used in Dragon Arena.
- There is a Gate Lock in this Guild Hall, but it does nothing. Guild Thieves used to be a feature of Imperial Isle. An update removed them without removing the gate locks.