Oola's Lab
 This article is about the Oola's Lab dungeon. For the repeatable primary quest associated with the Oola's Laboratory page in the Hero's Handbook, see The Elusive Golemancer.
| Oola's Lab | |
|---|---|
| |
| Campaign | Eye of the North |
| Region | Depths of Tyria |
| Type | Dungeon |
| Levels | 3 |
| Reward chest | Oola's Chest |
| Required quest | Little Workshop of Horrors |
| Party size | 8 |
| Exit(s) | Magus Stones |
| Images | |
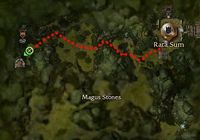 Getting there from Rata Sum | |
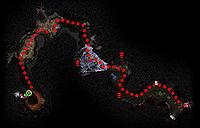 Level 1 | |
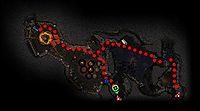 Level 2 | |
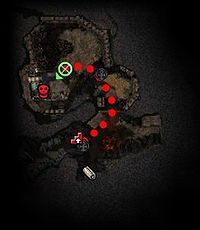 Level 3 | |
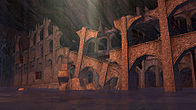 Unknown ruins on level 2 | |
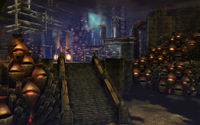 Oola's Lab on level 3 | |
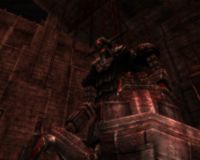 Iron Forgeman replicas. | |
“Oola, a reclusive Asura whose magical skills and achievements have made her a nearly legendary figure, once resided at the bottom of a labyrinthine system of caverns. Disdaining polite society, she sequestered herself in a hidden laboratory to continue her work in peace and quiet. When her fellow Asura needed her expertise in the battle against the Destroyers, Oola rejoined them. With no one left to maintain the golems that once guarded the lab, her creations went berserk. The only way to restore order was by tracking down the TPS regulator, the ultimate source of these major malfunctions.
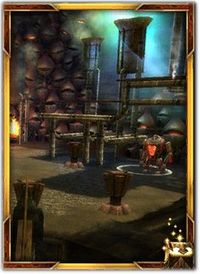
Oola's Lab, also referred to as Oola's Workshop, is the large underground laboratory complex belonging to Oola. The main lab itself resides behind a series of caverns full of various defensive mechanisms and traps. Within the largest room of the lab, several replications of the Iron Forgeman, all smaller than the original, can be found in various stages of development. The lab's defense systems are ran by the total protection security regulator golem.
Rewards[edit]
- Asura reputation points
- First time: 500 (750 in hard mode)
- On repeat: 250 (375 in hard mode)
Interactive objects[edit]
- Area Map
- Boss Lock
- Dungeon Lock
- Locked Chest
- Lost Note
- Unstable Magical Energy Storage
- Oola's Chest (appears after killing the TPS Regulator Golem)
Hidden objects[edit]
Hidden objects are revealed using Light of Deldrimor.
- Level 1
 24 (24) Dwarven Ghost - One by the Area Map near the entrance.
 24 (24) Dwarven Ghost - One by the second resurrection shrine.
 1 (20) Hidden Treasure - Three in the room with the third resurrection shrine.
 1 (20) Hidden Treasure - Three in the room beyond the room with the third resurrection shrine.
 1 (20) Hidden Treasure - One in the hallway north of the exit to level 2, before it opens into the final room.
 1 (20) Hidden Treasure - Three in the final room.
- Level 2
 24 (24) Dwarven Ghost - One by the second resurrection shrine.
 24 (24) Dwarven Ghost - One next to the Area Map.
 24 (24) Dwarven Ghost - One in the secret room north of the Dungeon Key.
 1 (20) Secret Switch - By the Unstable Magical Energy Storage in the northwest parts of the forge room. Opens the room all the way at the end, beyond the forge.
 1 (20) Hidden Treasure - One in the doorway near the second resurrection shrine.
 1 (20) Hidden Treasure - Two in the room with the many flame darts, in the south.
 1 (20) Hidden Treasure - One in the forge room southwest from the third resurrection shrine, on the opposite side of the wall.
 1 (20) Hidden Treasure - One by the Unstable Magical Energy Storage in the northwest parts of the forge room.
 1 (20) Hidden Treasure - Three in the secret room north of the Dungeon Key.
 1 (20) Hidden Treasure - Two in the room near the exit to level 3.
- Level 3
 24 (24) Dwarven Ghost - One in the secret room south of the Area Map.
 1 (20) Secret Switch - One directly opposite the entrance, on the other side of the lava pit. Opens a secret room south of the Area Map.
 1 (20) Hidden Treasure - Four in the secret room south of the Area Map.
 1 (20) Hidden Treasure - One near the second resurrection shrine.
 1 (20) Hidden Treasure - Two in the room past the second resurrection shrine.
 1 (20) Hidden Treasure - Three on the platform with the TPS Regulator Golem.
NPCs[edit]
Allies[edit]
 1 Beacon of Droknar (Provides Dwarven Raider)
 20 Vixx (collector for 5 Golem Runestone)
Foes[edit]
Arachnids (level 1)
 20 (26) Needling Lavastrider


 20 (26) Malfunctioning Golem (all levels)
 20 (20) Golem (level 2)
 20 (26) Unstable Golem (all levels)
 20 Worker Golem
Imps (level 2)
 24 (26) Forge Imp
 20 (26) Thorn Beetle Queen (level 1)
 20 (26) Ghosteater Beetle (levels 1 and 2)
 20 (26) Thorn Beetle (levels 1 and 2)
Skelk (level 2)
 24 (26) Skelk Rampager
 24 (26) Skelk Corrupter
 24 (26) Skelk Slasher
Spirits (level 1)
 22 (26) Spirit of Disenchantment
 22 (26) Spirit of Pain
 22 (26) Spirit of Shadowsong
Bosses[edit]
Golems
 24 (30) Malfunctioning Shield Golem → Steady Stance (Crystal Core Maul) (level 2)
 24 (30) Flame Guardian → Elemental Attunement (three on level 1, two on level 3)
 24 (30) Malfunctioning Regulator Golem → Elemental Attunement (two on level 2)
 24 (24) Xien → Shadow Prison (level 1) (only during Little Workshop of Horrors)
Boss-like foes[edit]
Golems
 20 (26) Malfunctioning Enduring Golem (level 2)
 29 (32) TPS Regulator Golem (level 3)
Notes[edit]
- The Area Map incorrectly shows the location of the Dungeon Key on the first level. The Dungeon Key is actually dropped by Xien, and you can only kill him at the end of the first level.
- Xien will not spawn without the required quest (Little Workshop of Horrors — obtained from Blimm in Rata Sum), thus preventing access to level 2.
- Completion of this dungeon will fill in page #13 of the Master Dungeon Guide storybook.
Trivia[edit]
- The Total Protection Systems Regulator Golem, or TPS Regulator Golem, is a reference to the film Office Space's TPS reports.
- The message written on the Lost Note also references a running joke in the Office Space.
| One-level | Ooze Pit • Fronis Irontoe's Lair • Secret Lair of the Snowmen |
|---|---|
| Two-level | Arachni's Haunt • Bogroot Growths • Sepulchre of Dragrimmar |
| Three-level | Bloodstone Caves • Catacombs of Kathandrax • Cathedral of Flames • Darkrime Delves • Heart of the Shiverpeaks • Oola's Lab • Raven's Point • Rragar's Menagerie • Shards of Orr • Vloxen Excavations |
| Five-level | Frostmaw's Burrows • Slavers' Exile |