Cathedral of Flames
From Guild Wars Wiki
Jump to navigationJump to search
| Cathedral of Flames | |
|---|---|
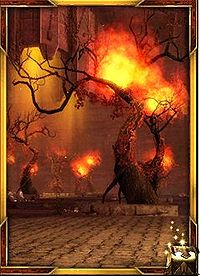
| |
| Campaign | Eye of the North |
| Region | Depths of Tyria |
| Type | Dungeon |
| Levels | 3 |
| Reward chest | Murakai's Chest |
| Required quest | Temple of the Damned |
| Party size | 8 |
| Exit(s) | Doomlore Shrine |
| Images | |
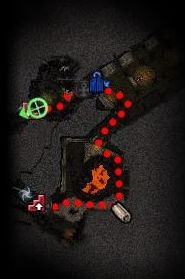 Level 1 | |
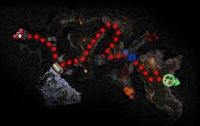 Level 2 | |
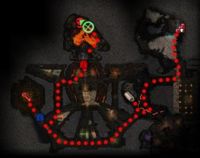 Level 3 | |
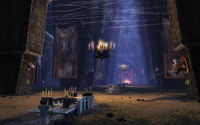 "Burning Temple" on level 1 | |
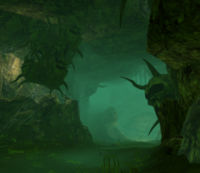 Spider webs on level 2 | |
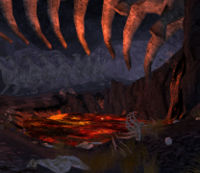 Lava lake on level 2 | |
“Once freed, Pyre's warband sacked the cathedral, looking for anything of value. In their search, they unearthed a blocked passage. Clearing the debris revealed a stash of treasure plundered from Ascalonian ruins... but there was more. The spirits of those slain for these spoils of war had attached themselves to the treasure, haunting the vaults. Worse yet, a powerful Necromancer named Murakai dwelt among them. She used the creatures' unliving essence to create a storm of souls, which she planned to unleash upon human and Charr alike. It fell to us to lay these disembodied spirits to rest and to suspend Murakai's wrath, if only for a time.
Rewards[edit]
- Ebon Vanguard reputation points
- First time: 1,500 (2,250 in hard mode)
- On repeat: 750 (1,125 in hard mode)
Interactive objects[edit]
- Area Map
- Boss Lock
- Dungeon Lock
- Lost Note
- Locked Chest
- Murakai's Chest (reward chest, after killing Murakai, Lady of the Night)
Hidden objects[edit]
Hidden objects are revealed using Light of Deldrimor.
- Level 1
 24 (24) Dwarven Hero - One next to the Area Map.
 24 (24) Dwarven Hero - Just inside the dining hall.
 1 (20) Hidden Treasure - Six in the dining hall: one right next to Faze Magekiller, three scattered halfway into the hall, and two at the rear end near the resurrection shrine.
 1 (20) Hidden Treasure - Four in the last chamber before going to the next level.
- Level 2
 1 (20) Hidden Treasure - One at the fork in the road, directly east from the level entrance.
 1 (20) Hidden Treasure - One in the corridor north of the fork in the road.
 1 (20) Hidden Treasure - One close to the Area Map.
 1 (20) Hidden Treasure - One at the poison trap in the dead end near the furnace.
 1 (20) Hidden Treasure - One at the second hanging pot of lava.
 1 (20) Hidden Treasure - Two in the lava pool north of the dungeon gate.
 1 (20) Hidden Treasure - Three in the lava pool south of the dungeon gate.
- Level 3
 1 (20) Hidden Treasure - One near the level entrance.
 1 (20) Hidden Treasure - Two in the room with the burning trees.
 1 (20) Hidden Treasure - One just beyond the room with the burning trees, overlooking the chasm.
 1 (20) Hidden Treasure - Two on the uneven floor in the south from the burning trees.
 1 (20) Hidden Treasure - Three at the Area Map.
 1 (20) Hidden Treasure - One at the wall northeast of the Area Map, on the south side.
NPCs[edit]
Allies[edit]
 20 (20) Akom (collector for 5 Stone Claws)
 20 (20) Dextarr Dirtdigger (collector for 50 Diessa Chalices)
 20 (20) Lars Bridgeater (collector for 25 Golden Rin Relics)
 1 (20) Beacon of Droknar (Provides Dwarven Raider)
Foes[edit]
 20 (26) Needling Lavastrider (level 2)
Charr

 20 (26) Charr Axemaster (levels 1 and 2)
 20 (26) Charr Blademaster (levels 1 and 2)
 20 (26) Charr Seeker (levels 1 and 2)
 20 (26) Charr Mender (level 2)
 20 (26) Charr Hexreaper (level 1 and 2)
 20 (26) Charr Dominator (levels 1 and 2)
 20 (26) Charr Flameshielder (levels 1 and 2)
 24 (26) Enchanted Hammer (levels 2 and 3)
 24 (26) Enchanted Bow (levels 2 and 3)
 24 (26) Enchanted Daggers (levels 2 and 3)
 24 (26) Enchanted Spear (levels 2 and 3)
 15 (26) Restless Spirit (levels 1 and 2)
 20, 21, 22, 23 (26) Crypt Banshee (all levels)
 24 (26) Restless Spirit (levels 1 and 2)
 20, 21, 22, 23 (26) Crypt Wraith (levels 1 and 3)
 24 (26) Servant of Murakai (levels 1 and 3)
 20, 21, 22, 23 (26) Shock Phantom (all levels)
 20, 21, 22, 23 (26) Ash Phantom (all levels)
 18 (25) Bone Fiend (level 3)
 20 (26) Crypt Ghoul (all levels)
 20 (26) Plague Zombie (levels 2 and 3)
 20 (26) Crypt Slasher (all levels)
Bosses[edit]
Charr
 24 (24) Faze Magekiller → Power Block (The Magekiller) (level 1)
 24 (24) Tyndir Flamecaller → Ether Prodigy (level 2)
Ghosts
 28 (30) The Master → Jagged Bones (Focus of the Master) (level 2)
 28 (30) The Keeper → Life Transfer (Scepter of the Keeper) (level 1)
 24 (30) Murakai's Steward → Corrupt Enchantment (level 3)
Skeleton
 24 (30) Vraxx the Condemned → Soldier's Fury (Aegis of the Condemned, Bastion of the Condemned, Shield of the Condemned) (level 2)
Boss-like foes[edit]
Ghosts
 29 (32) Murakai, Lady of the Night (level 3)
 24 (26) Keymaster of Murakai (level 3)
Notes[edit]
| The Guild Wars 2 Wiki has an article on Cathedral of Flames Gate. |
- This is the only place where Golden Rin Relics and Diessa Chalices are dropped.
- Corpses of Charr can be found throughout all three levels.
- Completion of this dungeon will fill in page #3 of the Master Dungeon Guide storybook.
- Level 1: The Keeper (and minions) can spawn behind the door to the next level, making them impossible to kill without enough ranged damage.
- Level 3: If the Keymaster of Murakai is allowed to travel all the way back to its resting point, the dungeon key may drop over the edge of the lava stream, making it unreachable.
- Level 1:
- The group of Charr near the area map may get stuck in the wall.
- Leaving Faze Magekiller just out of the Danger Zone will leave him friendly and his group will attack him.
- After The Keeper is defeated, the mobs that subsequently spawn do not attack unless engaged, even if they are inside the aggro bubble.
- Level 2:
- Leaving Tyndir Flamecaller just out of the Danger Zone will leave him friendly and his group will attack him.
- The Master and his minions sometimes spawn behind the door to the third level, making them harder to kill.
| One-level | Ooze Pit • Fronis Irontoe's Lair • Secret Lair of the Snowmen |
|---|---|
| Two-level | Arachni's Haunt • Bogroot Growths • Sepulchre of Dragrimmar |
| Three-level | Bloodstone Caves • Catacombs of Kathandrax • Cathedral of Flames • Darkrime Delves • Heart of the Shiverpeaks • Oola's Lab • Raven's Point • Rragar's Menagerie • Shards of Orr • Vloxen Excavations |
| Five-level | Frostmaw's Burrows • Slavers' Exile |