Arachni's Haunt
| Arachni's Haunt | |
|---|---|
| |
| Campaign | Eye of the North |
| Region | Depths of Tyria |
| Type | Dungeon |
| Levels | 2 |
| Reward chest | Arachni's Spoils |
| Required quest | Scrambled Reinforcements |
| Party size | 8 |
| Exit(s) | Magus Stones |
| Images | |
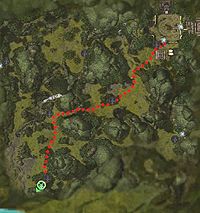 Getting there from Rata Sum | |
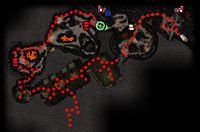 Map of the first level. | |
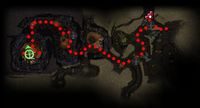 Map of the second level. | |
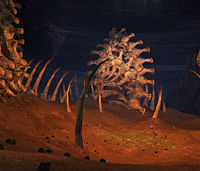 Arachni's bone pit in the second level. | |
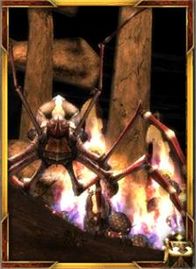
“Arachni's Haunt is the lair of a mighty spider and her brood of matriarchs. The web-strewn caverns also contain potent energy veins the Asura tap to fuel their creations. Commander Hixx and his battle krewe were station [sic] here to protect this resource, and they're still locked in an unending battle against the matriarchs. These creatures spin webs that no normal fire can burn through. In response to this sticky development, Mamp developed a super-heated staff capable of burning through the silk and setting the matriarch's massive egg sacs ablaze. Fragments of destroyed young can still be found littered amongst the corpses of Hixx's shattered patrol. Destroying the egg sacs, it seems, is a sure way to enrage the spider matriarchs, as well as Arachni herself.
NPCs[edit]
These quests will affect the spawns in this area:
Allies[edit]
 1 (20) Beacon of Droknar (Provides Dwarven Raider, all levels)
 20 (20) Dagnor Grubeater (level 1) (5 Lavastrider Appendages)
Light of Deldrimor Rewards[edit]
Level 1[edit]
 24 (24) Dwarven Ghost can be found in the rectangular chamber with the poison arrow traps.
- Dwarven Ghost can be found near the Spider Matriarch, on the ledges above the eggs. Go behind the left hand eggs to find it
 1 (20) Secret Switch near the south corner of Lok The Mischievous's room, which opens the door to a secret area that contains multiple Hidden Treasures and a Dwarven Ghost.
- 3 Hidden Treasures can be found near Dagnor Grubeater.
- 3 Hidden Treasures can be found near the dungeon key.
Level 2[edit]
- There is a secret passage way that opens at the Area Map if you use Light of Deldrimor at the nearest intersection to the Area Map and then activate the switch. This passageway will lead you straight to the Flame Guardian. The passage also contains two Hidden Treasures, side by side.
- A Hidden Treasure is located under the Flame Guardian.
- Two Hidden Treasures are in a beetle-filled side room southwest of the entrance. One is in a water pool which conceals the light effect.
- There is a Hidden Treasure in that candlelit corridor south of the waterlogged room before the second Beacon of Droknar.
- There are two Hidden Treasures and a Dwarven Ghost in the waterlogged room, which conceals the glowing effect.
- The Treasures are placed towards the back, approximately three Zhed-Lengths into the water. One is approximately central to the (overgrown) exit, while the other is approximately central to the large ramp. The Dwarven Ghost is roughly in the middle of the room. A little trial and error may be in order.
- There is a Hidden Treasure in a dead-end southward corridor at the second Beacon of Droknar. It can be pinged on the compass while standing at the Beacon.
- A Hidden Treasure can be found near the entrance to the poison-filled spider room after the second Beacon of Droknar.
Foes[edit]
 5 (5) Albino Rat (level 2)
Arachnids (all levels)
 14 (24) Spider
 20 (26), 24 (26) Needling Lavastrider
 24 (26) Venomweaver
 24 (26) Lifeweaver
 24 (26) Painweaver
 24 (26) Bloodweaver
 20 (26) Flame Guardian (level 2)
 20 (26) Roaring Ether (level 1)
 24 (26) Burning Spirit (level 1)
 24 (26) Flowstone Elemental (level 1)
 28 (30) Forge Master (level 1)
Incubi (level 2)
 20 (26) Cryptwing Incubus
 20 (26) Bloodbath Incubus
 20 (26) Bloodthirst Incubus
Insects (level 2)
 20 (26) Thorn Beetle Queen
 20 (26) Ghosteater Beetle
 20 (26) Thorn Beetle
Jellies (level 1)
 20 (26) Aggressive Ooze
 20 (26) Ominous Ooze
 20 (26) Earthbound Ooze
Plants (level 1)
 10 (24) Fungal Spore
 15 (25) Parasitic Growth
 20 (26) Cave Aloe
 20 (26) Corrupted Aloe
Skelk (level 2)
 24 (26) Skelk Corrupter
 24 (26) Skelk Slasher
Bosses[edit]
 28 (30) Brood Warden (level 1) → Crippling Shot
 26 (30) Spider Matriarch (two on level 1, one on level 2) → Stunning Strike (The Matriarch's Stinger)
 28 (30) Lok The Mischievous (level 1) → Savannah Heat (Lok's Scepter)
Boss-like foes[edit]
 29 (32) Arachni
Interactive objects[edit]
- Locked Chests
- Arachni's Spoils (spawns after defeating Arachni)
Notes[edit]
- You earn 1,500 Asuran reputation points the first time you complete this dungeon in normal mode (2,250 in hard mode); subsequent visits reward half that (750 and 1,125 points respectively).
- Though you can walk past them easily, burning the spider eggs is the only way to spawn Spider Matriarchs, and thus get the Dungeon Key.
- Lok The Mischievous's fiery boulders will kill you instantly if you are struck by them, although they do not cause any Death Penalty.
- To disable the fire traps on Level 2, kill the Flame Guardian in the southeastern corner.
- Completion of this dungeon will fill in page #14 of the Master Dungeon Guide storybook.
- On Level 1: an extra normal gate and several hidden rooms.
- On Level 2: an extra Asura Gate behind one of the walls.
Trivia[edit]
- Arachni's nest is located within a ring of colossal bones covered in webs.
- Prior to the July 19, 2012 update, players could reach the second level behind the door by scraping the right side.
| One-level | Ooze Pit • Fronis Irontoe's Lair • Secret Lair of the Snowmen |
|---|---|
| Two-level | Arachni's Haunt • Bogroot Growths • Sepulchre of Dragrimmar |
| Three-level | Bloodstone Caves • Catacombs of Kathandrax • Cathedral of Flames • Darkrime Delves • Heart of the Shiverpeaks • Oola's Lab • Raven's Point • Rragar's Menagerie • Shards of Orr • Vloxen Excavations |
| Five-level | Frostmaw's Burrows • Slavers' Exile |