Destruction's Depths
| Destruction's Depths | |
|---|---|

| |
| Section | Primary Dwarf Quests |
| Campaign | Eye of the North |
| Given by | Jalis Ironhammer in Battledepths (Depths of Tyria) |
| Part of | Against the Destroyers |
| Preceded by | Heart of the Shiverpeaks |
| Followed by | A Time for Heroes |
| Type | Primary quest |
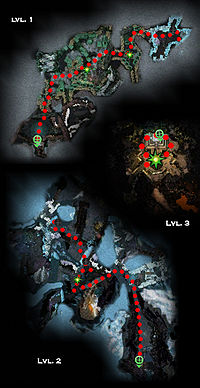
| Map(s) | |
 (Click to enlarge) | |
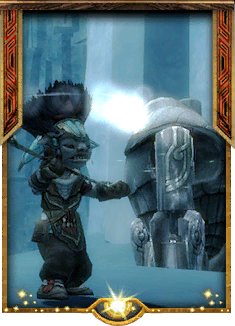
The time has come. Launch a final offensive against the Destroyers, with every ally you managed to recruit, to determine the fate of Tyria.
Quest information[edit]
Requirements[edit]
- All party members must have received the reward for Heart of the Shiverpeaks (quest).
- It is possible to enter the mission with just one person meeting the requirement, but anyone else will not receive any credit for mission completion.
- However, completing the mission does grant all players access to Central Transfer Chamber, making this a popular exploit for players who want Chaos Gloves without having to play through Eye of the North.
Objectives[edit]
- Speak to Jalis Ironhammer when you are ready to face this evil. (disappears after entering the mission)
- Find and reclaim the Central Transfer Chamber
- Take command of the golems and find the missing Asuran patrol.
- Rendezvous with the Ebon Vanguard.
- Clear a path into the depths with the Ebon Vanguard.
- Continue deeper into the caverns.
- Fight beside the Norn as they hold off the Destroyers.
- Travel to the Central Transfer Chamber via the Asura Gate.
- Clear the Central Transfer Chamber of Destroyers.
Reward[edit]
- Dwarf reputation points
- First time: 3,000 (4,500 in hard mode)
- On repeat: 300 (450 in hard mode)
- 2,500 Experience
Walkthrough[edit]
The quest begins when you speak to Jalis Ironhammer outside the Central Transfer Chamber, who teleports you to the Depths of Tyria.
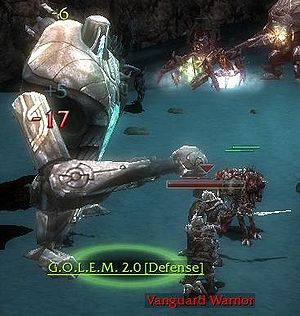
Level 1: Upon entering, you'll notice three G.O.L.E.M. 2.0s along the wall with Oola. Activating each one requires a player to expend 15 energy. Once activated, a player may interact with one to switch its mode to Attack, Defense, or Ranged.
Plow your way through some basic cave critters to make your way to Renk and Sokka then fend off the nearby destroyers. Oola will alert the party of a missing Vanguard group nearby. You'll find Captain Langmar a short way away accompanied by Chance Redding and Jenn Valefield. Continuing west, you'll see a number of Vanguard groups engaged with destroyers. You can try to save them, but the destroyers will likely kill them. South, you'll see a large battle between the Vanguard and destroyers. Again, the odds are stacked in favor of the destroyers, so it's often best to simply rush to the zone on the other side of the room while the Vanguard have the Destroyers occupied.
Level 2: Here, you'll have to reactivate the golems. A short way outside, you'll see dryders and destroyers. These groups will battle if they come within aggro range of each other. Try to run by the second group of dryders on your way to the Norn. Once at the Norn, Destroyers will start coming in from multiple fronts. Taking them all on at the same time may be tricky, but if you position yourself away from the center (where the quest marker is), you can avoid aggro with half the assault group until you're ready for them. Another tactic is to let the golems die along the bridge, blocking the path, and thus protecting you from the Destroyers' deadly warriors and dervishes while you attack with arrows and spells. Once the assault is over, follow Olaf Olafson to where he will open a door. Follow this path, fight a few more Destroyers, and enter the portal by the Stone Dwarves into the Central Transfer Chamber. Don't spend too much time with Dwarves, or you will be caught up with large swarm of Destroyers which have followed your trails.
Level 3: Once in the chamber, activate the golems again. This room is not very big, and the goal is simple: defeat all the Destroyers there. Clear the nearest groups then pull the Disc of Chaos up the stairs (or just leave it for last), as its devastating, powerful attacks are much easier to suppress when it is by itself. Most of its attacks are point-blank, so standard tanking procedures should be sufficient until it is defeated. Setting the golems to ranged may keep them active longer. Alternatively, having the golems set to defensive and staying within their range is viable if you are having trouble keeping your party alive. Because the disc is an Elementalist, assigning one character to daze it and attack it with a weapon will nearly eliminate the threat it poses.
Hard mode[edit]
Destroyers only gain 2 levels in hard mode so their armor rating isn't significantly increased. However their damage is much higher. It is highly recommended to go to the ice bridge and let the golems body block the bridge as stated above to protect your party on level 2. It is also much more important to not aggro more than one group, and not to ball up as the melee destroyers have effective area of effect damage that is boosted in hard mode that can wipe an unprepared party.
NPCs[edit]
Allies[edit]
Asura (level 1)
 24 (24) Stone Dwarf (axe wielder) (level 2)
 24 (24) Stone Dwarf (hammer wielder) (levels 2 and 3)
 24 (24) Stone Dwarf (levels 2 and 3)
 24 (24) Stone Dwarf (level 2)
 24 (24) Stone Dwarf (level 2)
Golems (Asura)
 20 (20) G.O.L.E.M. 2.0 (all levels)
Humans (Ebon Vanguard) (level 1)
 20 (20) Captain Langmar
 20 (20) Chance Redding
 20 (20) Jenn Valefield
 20 (20) Vanguard Warrior
 20 (20) Vanguard Ranger
 20 (20) Vanguard Monk
Norn (level 2)
 20 (20) Olaf Olafson
 20 (20) Olrun Olafdottir
 20 (20) Sif Shadowhunter
 20 (20) Egil Fireteller
Foes[edit]
 28 (30) Destroyer of Bones (levels 1 and 2)
 28 (30) Destroyer of Earth (levels 1 and 2)
 28 (30) Destroyer of Flesh (levels 1 and 2)
 28 (30) Destroyer of Sinew (all levels)
 28 (30) Destroyer of Deeds (levels 1 and 2)
 28 (30) Destroyer of Hordes (levels 1 and 2)
 28 (30) Destroyer of Hope (all levels)
 28 (30) Destroyer of Thoughts (all levels)
 28 (30) Destroyer of Lives (all levels)
 20 (26) Chromatic Drake (level 2)
 20 (26) Icy Stalagmite (levels 1 and 2)
 20 (26) Shattered Elemental (level 1)
 20 (26) Scourge Vaettir (level 1)
 20 (26) Shadow Vaettir (level 1)
 20 (26) Mist Vaettir (level 1)
Bosses[edit]
Destroyers
 28 (30) Avatar of Destruction → Battle Rage (level 1)
 28 (30) Avatar of Destruction → Onslaught (level 2)
Boss-like foes[edit]
Destroyers
 30 (32) Disc of Chaos (level 3)
Dialogue[edit]
- Jalis Ironhammer
- "The Eye of North has revealed the source of the Destroyers. We must journey deep within the Shiverpeak Mountains and eliminate the evil at its core. The power of the Great Dwarf and your many allies await your command to begin the final assault."
Intermediate dialogue[edit]
At the beginning:
- Oola: "The Asura Gate leading to the Central Transfer Chamber is far beneath us, and overrun by destroyers...but I'm not worried. In fact, I'm so confident that I'm going to send you ahead."
- <Party leader>:"Thanks for the vote of confidence. Have any of the Asuran patrols in the area come back from those caverns?"
- Oola:"Not yet. Take some of my golems along as well. I refit them to let you switch their modes, while allowing me to communicate with you. I wouldn't do that for just any human..."
When entering second room:
- Renk: "Hey! I recognize those golems! Oola sent you, didn't she? Help us hold off these Destroyers!"
After defeating the Destroyers in second room:
- Renk: "Aha! We've got them on the run. Three cheers for Oola and her magnificent golems! Ho, right. And the humans, too. Hurrah!"
- Oola: Incoming message from Oola: "A group of the Ebon Vanguard are missing in the caverns. Determine their location. Seek the gate to the Central Transfer Chamber. And don't break my golems." Message ends.
- <Party leader>: "A Vanguard unit is missing? I bet they're down here too. Now that those Destroyer pests are out of the way, open the gate for us. We'll head farther in and see if we can find them."
- Sokka: "You want to keep going? After that fight? You are brave, human! Don't let me stand in your way."
When approaching the first Ebon Vanguard group:
- Captain Langmar: "There you are! There's a new breach in the caverns that's infested with Destroyers. We've held them back, but we're running out of soldiers. Are you ready for some action?"
- <Party leader>: "I'm pretty sure these golems can hold them off while we do some serious damage to those Destroyers. Let's go."
- Captain Langmar: "These Destroyers are nothing to fear! Push them back! Show them the might of the Ebon Vanguard! For Ascalon!"
After killing the Destroyers in final room on first level:
- Oola: Incoming message from Oola: "Have you solve the problem yet? What's taking you so long? Hope you are well. My golems had better be in one piece." Message ends
- Captain Langmar: Those Asura are always fussing at someone. Here, this passage should take you down toward the main Asura Gate. Thanks for your help. Good luck!
When approaching the Norn:
- Olaf Olafson: "You made it? You must have the strength of the bear spirit! We'll make a Norn of you yet, cub."
- Sif Shadowhunter: "No time to train. Here come the fiends again! We'll hold the openings. You handle any stragglers, little one."
Between the Destroyer waves:
- Egil Fireteller: "Look there. Another wave is coming from the side. Bear bless the day I lifted my first weapon. We will need all the strength we have!"
- Olrun Olafdottir: "Those monsters of yours...they fight like Norn! With you by our side, we cannot fail!"
After the Destroyer waves:
- Sif Shadowhunter: "Those stone Dwarves held their own like true heroes. You did well, too. That seems to be the last of them. Just when it was getting interesting...."
- Olaf Olafson: "Allow me. A little ice never kept a Norn from reaching his prey! The Dwarves are through here. Seems they've already found the Asura Gate. You'd best get going."
- <Party leader>: "I'm on my way. May the bear spirit see me through!"
When approaching the Dwarves:
- Stone Dwarf: "Thank the Great Dwarf. Reinforcements! I pray that the strength you bring will be enough, human. We can spare two of our men for you. The rest must hold the gate."
- Stone Dwarf: "My kinsmen! Our entire lives, and the lives of our ancestors, have led to this moment! The strength of the Great Dwarf flows through us!"
- Stone Dwarf: "Go! Clear the Central Transfer Chamber! Our sacrifice will not be in vain!"
- <Party leader>: "Follow me. Through that gate! For Deldrimor!"
When entering third level:
- <Party leader>: "This place is infested. We need to clear out every last Destroyer before we move forward."
- Stone Dwarf: "Don't just stand there. Get those golems into battle. We need all the help we can get."
- Stone Dwarf: "Great Dwarf, guide my hammer in this battle."
Notes[edit]
- The bodies of inactive Golems may be used to form choke points if you can get them to die at narrow passage openings.
- In addition to the Disc of Chaos, all foes in the last map zone must be defeated to complete the quest.
- Upon completion of this quest, players will be brought to the Central Transfer Chamber.
- King Jalis is directly outside the Central Transfer Chamber; it is possible to start from there when repeating this quest.
- This quest (and all primary repeatable Eye of the North quests) may also be obtained from the Scrying Pool in the Hall of Monuments after the initial completion.
- Completion of this mission will fill in page #15 of the Hero's Handbook storybook.
| Eye of the North primary repeatable quests and missions |
|---|
| Asura arc: Finding the Bloodstone and The Elusive Golemancer » Genius Operated Living Enchanted Manifestation |
| Ebon Vanguard arc: Against the Charr » Warband of Brothers » Assault on the Stronghold |
| Norn arc: Curse of the Nornbear » A Gate Too Far and Blood Washes Blood |
| Deldrimor arc: Destruction's Depths » A Time for Heroes |
| Challenge: Glint's Challenge |
