Shards of Orr
| Shards of Orr | |
|---|---|
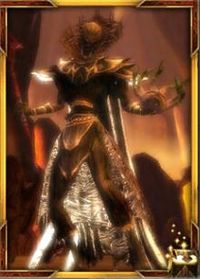
| |
| Campaign | Eye of the North |
| Region | Depths of Tyria |
| Type | Dungeon |
| Levels | 3 |
| Reward chest | Fendi's Chest |
| Required quest | Lost Souls |
| Party size | 8 |
| Exit(s) | Arbor Bay Gadd's Encampment |
| Images | |
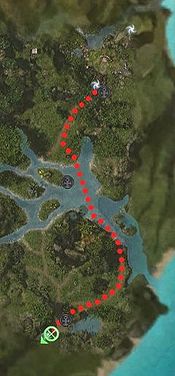 Getting there from Vlox's Falls | |
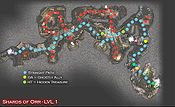 Level 1 | |
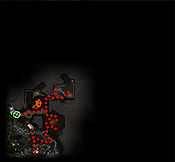 Level 2 | |
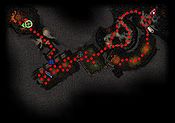 Level 3 | |
 Shards of Orr to Gadd's Encampment | |
“An ancient ghost recounted a haunting tale of piracy and betrayal. Following her defeat during the Second Great Corsair War, the corsair leader Lady Glaive sailed the tattered remnants of her fleet north to the Tarnished Coast. There, she parlayed a deal with King Zoran of Orr, father to King Reza, to gain amnesty for her forces within the caverns we now call the Shards of Orr. Unbeknownst to Lady Glaive, one of her own lieutenants, a young corsair named Fendi, made his own deal with the king's adviser. Fendi betrayed his leader and his crew. Glaive escaped, but most of the crew were slain. Their spirits remain enslaved by the betrayals of the past. Soon afterward, the dark pact Fendi made with the adviser showed its true nature. Fendi joined the ranks of the undead, forced for all eternity to draw his power from the souls of those trapped with him.
— in-game description
The Shards of Orr was originally an armory and storehouse for Orr, before being turned into a refuge for the Queen of Fools crew. After Fendi Nin's betrayal, Glaive escaped, but her ultimate fate remains unknown, and she had to leave the bulk of her crew behind.
Magical energies washed the Tarnished Coast shores after the Cataclysm, making already deadly monsters more powerful from these energies. These energies attracted the Asura as well, who established a secondary Asura Gate to Sparkfly Swamp within the Shards.
Getting there[edit]
From Vlox's Falls head south. You will also pass through this dungeon as part of Finding Gadd. If you have access, you can start directly from Gadd's Encampment (however, if your goal is completing Lost Souls, you will need to visit the other entrance to find Crewmember Shandra; only she can open some of the dungeon locks).
NPCs[edit]
Allies[edit]
Collectors[edit]
 20 Qogg (collector for 5 Undead Bones) (level 1)
Hidden objects[edit]
Hidden objects are revealed using Light of Deldrimor.
Level 1[edit]
- Near the Beacon - 1 Dwarven Ghost
- Near the Dungeon Lock - several secrets, possibly 1 Ghost, 3 Hidden Treasures
- Near the stairs down to level 2 - several secrets, possibly 1 Ghost, 3 Hidden Treasures
- Between two Poison Jets, just north east of the exit to Gadd's Encampment - 3 Hidden Treasures
- North of the blue key, between Poison Jet and a large pillar - 1 Hidden Treasure
Level 2[edit]
- You must kill the Cursed Brigand (on the left shortly after the entrance) to get a chest to drop. The chest contains a torch that you need for lighting the braziers to proceed through the dungeon.
- In the Graveyard - several secrets, possibly 2 Ghosts, 4 Hidden Treasures (center 2 are the ghosts). Beware the many popups.
- Amongst the Poison Jets near the Dungeon Key - several secrets, possibly 6 Hidden Treasure
Level 3[edit]
- After the short hallway with Poison Jets, 4 Hidden Treasures
- Between the two horizontal fire traps at the entrance to the boss chamber - 2 Hidden Treasures
- In the south-eastern chamber (door opened by the Dungeon Lock) - 4 Hidden Treasures
Foes[edit]
 24 (26) Enchanted Axe (levels 1, 2 and 3)
 24 (26) Enchanted Sword (levels 1, 2 and 3)
 20, 21, 22 (26) Crypt Wraith (level 2)
 24 (26) Damned Crewman (level 3)
Phantoms (Undead)
 21, 22, 23 (26) Shock Phantom (levels 2 and 3)
Skeletons (Undead)
 20...24 (26) Skeletal Hound (level 1)
 24 (26) Skeleton Archer (all levels)
 24 (26) Skeleton Priest (all levels)
 24 (26) Skeleton Illusionist (all levels)
 24 (26) Skeleton Wizard (all levels)
Zombies (Undead)
 24 (26) Zombie Brute (all levels)
 24 (26) Chained Cleric (all levels)
 28 (30) Decayed Dragon (levels 1 and 3)
 24 (26) Zombie Necromancer (all levels)
Bosses[edit]
Skeletons (Undead)
 28 (30) Cursed Brigand → Blinding Surge (three on level 1, two on level 2, two on level 3)
Boss-like foes[edit]
 29 (32) Soul of Fendi Nin (level 3)
Zombies (Undead)
 29 (32) Fendi Nin (level 3)
Objects[edit]
- Area Map
- Chest (provides one Unlit Torch bundle)
- Dungeon Lock
- Fendi's Chest
- Flame Brazier
- Locked Chest
- Scrap of Parchment
Notes[edit]
- Completion of this dungeon rewards 1,500 Asuran points in normal mode and 2,250 in hard mode. Completing the dungeon for the first time in each mode rewards twice that.
- To complete the dungeon, you must destroy the Soul of Fendi Nin.
- Although Shandra cannot be killed, she does not attack or use skills in the dungeon. On the contrary, she often body blocks allies trying to maneuver.
- On the second floor, the Northernmost room with three interlinking traps allows an entire party to walk behind the traps against the wall, bypassing them entirely.
- Completion of this dungeon will fill in page #12 of the Master Dungeon Guide storybook.
Trivia[edit]
- The third level's map resembles an extended level of Forgewight's map in Slavers' Exile.
- In the Eye of the North fankit, a statue of Balthazar was shown in the area visited in level 2. At release, this statue was replaced with a sunspear statue.
| One-level | Ooze Pit • Fronis Irontoe's Lair • Secret Lair of the Snowmen |
|---|---|
| Two-level | Arachni's Haunt • Bogroot Growths • Sepulchre of Dragrimmar |
| Three-level | Bloodstone Caves • Catacombs of Kathandrax • Cathedral of Flames • Darkrime Delves • Heart of the Shiverpeaks • Oola's Lab • Raven's Point • Rragar's Menagerie • Shards of Orr • Vloxen Excavations |
| Five-level | Frostmaw's Burrows • Slavers' Exile |